![]()
Changes to my VMax :
ARTICLE IN:
![]() THIS
IS THE FIRST PAGE OF MY VMAX-STORY. AT THE BOTTOM OF EACH PAGE YOU CAN
CLICK TO GO TO ONE OF THE NEXT PAGES.
THIS
IS THE FIRST PAGE OF MY VMAX-STORY. AT THE BOTTOM OF EACH PAGE YOU CAN
CLICK TO GO TO ONE OF THE NEXT PAGES.
PICTURES OF WHAT IT LOOKED LIKE IN OCTOBER 2002 FROM THIS LINK, AFTER THAT IT WAS TAKEN APART FOR SOME SERIOUS TUNING WHICH UNFORTUNATELY MEANT ENDLESS WAITS FOR PARTS, BUT IT WILL ALL BE WORTH IT IN THE END I'M SURE !
I've made these pages as I made the changes to my bike, which means sometimes you can see a picture or read some text of something I've changed that's already been changed again because it didn't work or simply because I didn't like it. This way you get the complete story and sometimes this can mean you don't have to make the same mistake.
Also: I
get a lot of mail asking why I'm going through all this
trouble of modifying my VMax to get at least 150 BHP? Why
didn't I start with the 145 BHP version in the first
place?? Well, I did !!! The claimed 145 BHP are
CRANCKSHAFT BHP, meaning that - after passing through the
driveshaft losing 16 % of power - it only leaves about 115 BHP on the
rearwheel !!! All the BHP I'm talking about on these
pages are RHP meaning
REARWHEEL
HORSEPOWER !!!!!
Mine had 180 RHP on Nitrous with 18 M-Kg Torque after the first tuning was done in France.
Now - after being tuned by Paul Ritzen in Weert Netherlands - it has a Dynosheet with 207 RPH on Nitrous and 217 Nm just before the headbolts gave way and made the headgasket blow. That's all being changed now, for that info check the last page of this loooooooong story ;-)
The fact that there are so many pages means the VMax now looks different from the picture below. When you click the picture there's a picture of what it looks like for now. Bet it will change again very soon.
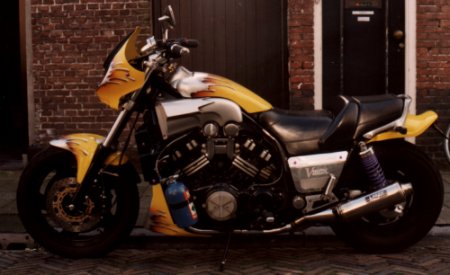
This is the VMax with the bottle fitted to the bike ( the wrong way around, valve should be to the front ). It's all functional, unlike on some VMaxxi I've seen around here. Some even mention that they have fake NOSsystems on their specsheets at shows.Why not make them functional guys??? It really is a laugh to use it. The moment you hit the button ( in 3rd gear above 3000revs ) that heavy machine feels like a 2-stroke. It flies forward, unlike the power you're used to on that already awesome bike.
The tuning with Dynojet Stage 7
kit and K&N airfilters went smooth,
just a couple of hours work
( by tuning expert Andy Hall of Moto- Technique
from Almere- fame )
Only one testride, a little work with the airjets and it was running properly.
Feels and sounds great, a V4 dragster.
On the picture below, a close-up. I
drilled and polished a strip of stainless steel and
mounted that to the two front enginebolts directly above
each other.
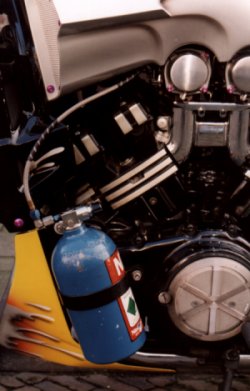
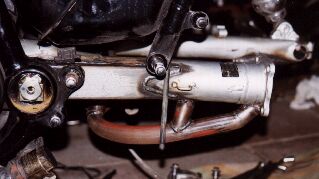
This is the intakemanifold with a fogger installed. Blue is Nitro, red is fuel.
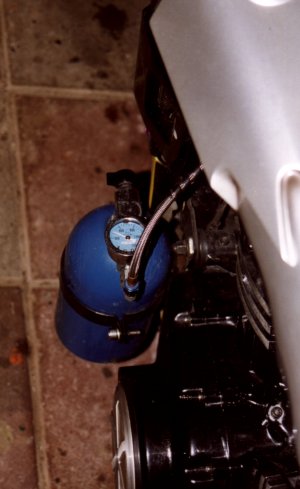
The bottle is now right way to the front. I also installed a NOS nitrousgauge to see how much is left in the bottle.
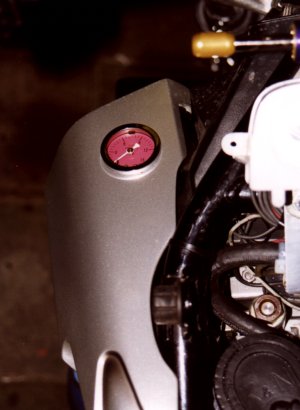
This is a more important gauge, it's
for fuelpressure. I also had
a fuelpressure safetyswitch installed. You can regulate
this to a certain pressure. If the pressure is to low, it
switches of the nitroussupply to prevent an
engine blow - up.
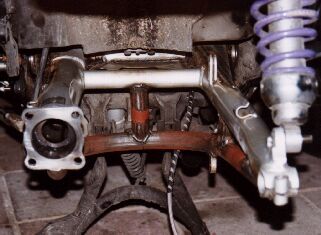
This topview shows you the way it looks
under the dummy. The original airfilterbox is removed in
favour of the K&N filters.
In front of the airfilters you can see the solenoids for
fuel and nitrous . Underneath the curved metal plate is
an additional NOS fuelpump,
because the standard one
( still in use for "normal" driving ) could not
build up enough pressure for both systems. I had to make
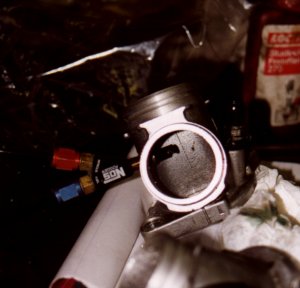
a special adaptor to plug
into the fueldrainplughole in the bottom of the tank (
drilled and tapped to 10mm, shown below ) to supply the
NOS fuelpump with it's own fuel, as the original fuelpump
emptied the NOS - one on ignition ( on one of the next
pages you will see this didn't work properly and I
changed the system again ).

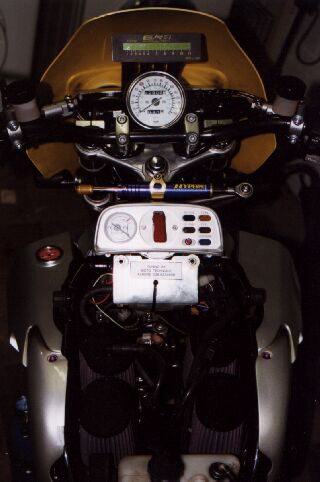
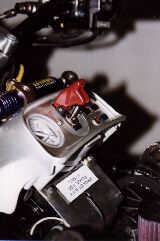
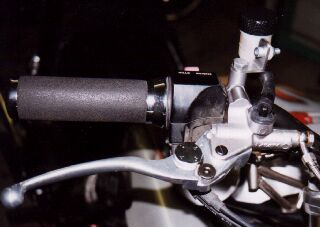
As you can see, the revcounter is removed and replaced by a stainless steel plate with the NOS arming switch ( a toggleswitch with a safety guard from an airplane ). In the picture below the system is armed. The hornbutton becomes a NOS button by flipping this little switch.
Also in the picture "under the dummy" you see the new digital tachometer on a much better place. Now I can keep looking straight ahead, instead of glancing down at high speed. The speedometer was moved forward and down a little, because I replaced the VMax risers for Radian risers, bringing the bars down and forward. The original brake - and clutch handles were replaced by ZZR 1100 items, with little carbonlook caps to match the front of the Venom - fairing.
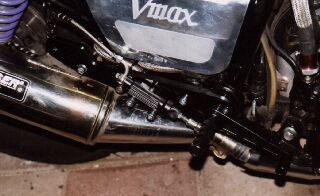
To get a better grip on the bike when using the NOS, the footrests and brake - and gearchange pegs were dumped in favour of a set of nice looking, black anodised aluminum rearsets, bringing my feet up about 2 cm and back about 12 cm. They are like MEK's sets without the holes machined out. This gives a better seating position.
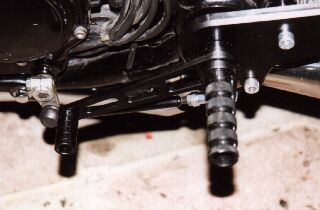
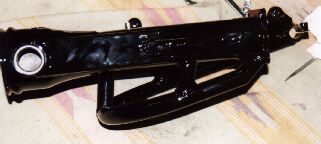
The final thing for this rebuild was to have the swingarm braced to improve handling ( did you know that - on acceleration - the swingarm twitches about 1" on the right side? Scary huh ).
This is the original, unbraced swingarm.
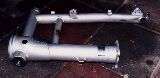
There are a lot of companies doing that
for a lot of money, but Piet van
Ballegoie from the Dutch
VMaxclub does it better and for a reasonable price
( not to say cheap ). He welds on a beautiful brace and
closes the rectangular gap behind the axletube, leaving
holes to reach the fuelsensor and drainplug. He also
braces the sides from the pivotpoint back, so there's no
twisting there as well. ( take a look at the second
picture below ). For the installation I had to remove the
centrestand and the balance pipe between the Laser Prostock exhausts ( changed
them for different make this September, see below ). I've
been told that removing the balancepipe should not affect
performance and only time ( and a Dyno run ) will tell.
On the right bottonbrace ( opposite to the original
topbracket ) you can see the bracket I had already welded
on, because I plan to replace the rearcaliper for a 2 -
pad Billet item, underslung.
Of course I had it sprayed black before installing !
SINCE THIS IS GETTING A RATHER LONG PAGE WHICH WILL BE LOADING SLOWER AND SLOWER THE MORE PICTURES I PUT ON IT, I STARTED A SECOND PAGE.
NOW THERE'S EVEN A THIRD PAGE
AND A FOURTH !!!
EVEN A FIFTH PAGE
FINALLY! # 6 HAS THE RESULTS OF THE TUNING !
CLICK HERE FOR THE RESULTS ON PAGE 6