These are the pictures of my Camden SuperCharger with 32/36 Weber.
I've made a kind of installation guide, with the use of knowledge of Larry Harris of www.izook.com and Sarge of www.performancewebers.com , both giving a lot of useful advice.
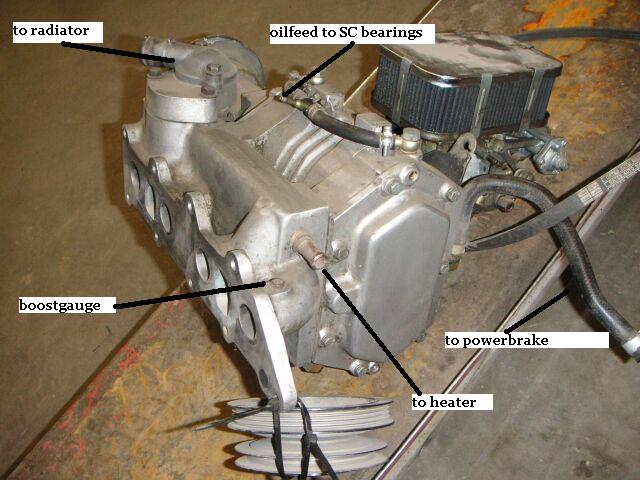
The thermostathousinghose runs to ( or actually from ) the radiator as it does originally ( just have to turn the original hose the other way around ) and it has the watertemp.sendingunit underneath. The hose on the right is for the vacuumbrake, it is connected to a vacuum-tube in the carb-adaptor. There is a PCV ( Positive Cranckcase Ventilation ) valve somewhere in the hose next to the vacuumbrake to prevent the vacuum from "leaking" back. The tube on the back of the intake ( facing this way as this picture is taken from the back of the SC ) is for the coolant going to the heater.
In the topback of the intake is a plugged hole for the boostgauge, I tried a connector from a waterheater I had lying around and it fitted perfect for the hose running to the gauge.
There's a double oilfeed on top and a double oilreturn on the bottom of the SC.
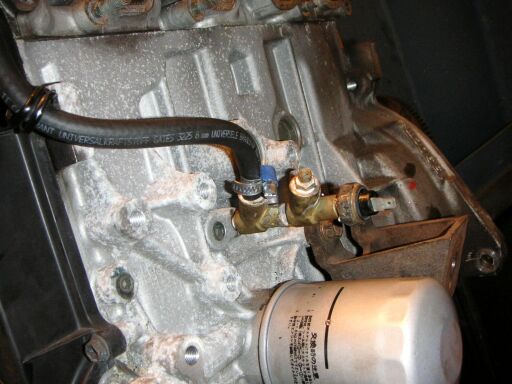
Oilfeed comes from a T- or Y-piece that goes in the place of the original oilpressurelight sensor, with the original sensor and the oilfeed connected to it. I had a second Y-piece brazed on the first one so I can hook up a oilpressuregauge.
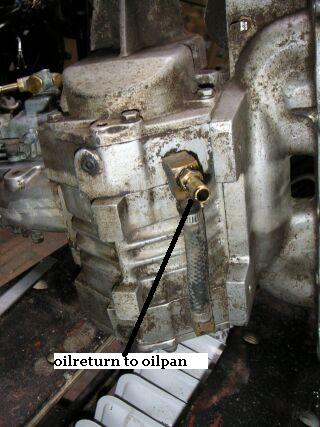
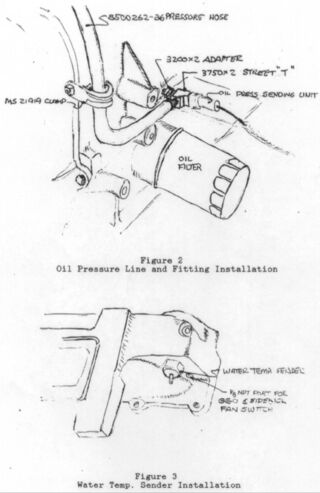
This is where the oil returns to the oilpan ( looking at the bottom of the SuperCharger ). I've asked Larry Harris of www.izook.com, the main source of Samurai-info permission to use the drawings he sent me, which are below.
I had a tube bolted into the oilpan for this, Larry gave me measurements and dimensions.
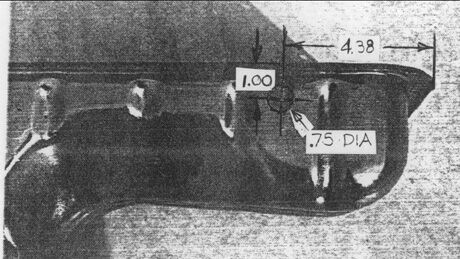
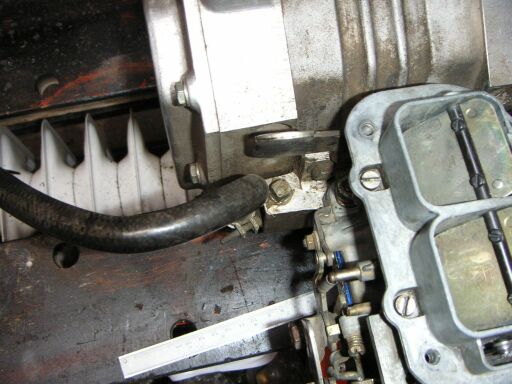
The oil returns from the bottom of the SuperCharger to the oilpan through this hose to the tube we bolted into the oilpan ( and yes: I did change this because the oilline rubs the enginemount in this picture ;-) )

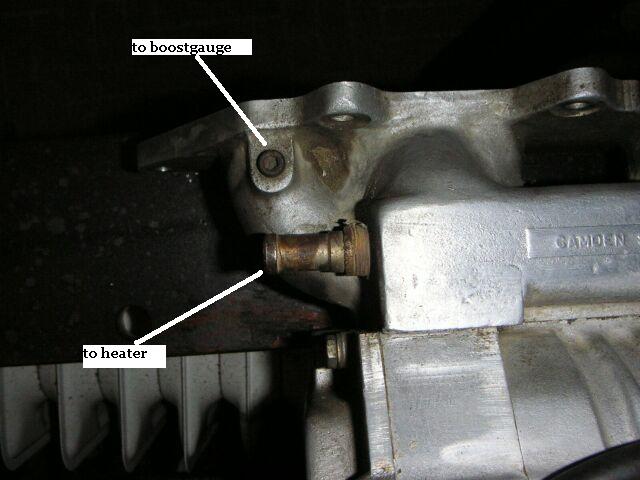
Another picture of the ( still plugged ) hole for the boostgauge and the tube to the heater.
Another shot of the hose to the powerbrake on the carb adaptor ( sucking vacuum ). The other ( plugged ) hole next to where the hose is attached is an additional vacuum hole, both holes are interconnected. There also an additional vacuum hole on the other lower side of the adaptor ( also plugged ) visible in the picture below.
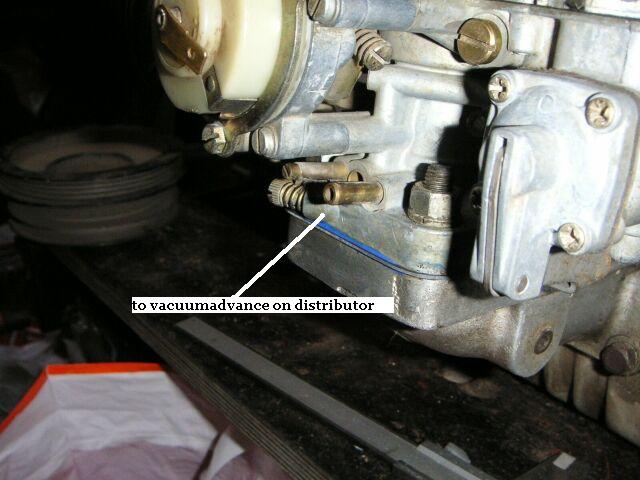
This is where the vacuum for the distributor goes, like on the original carb.
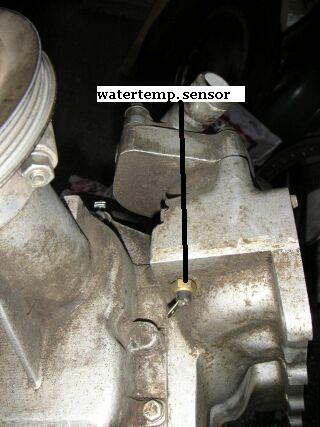
A picture of the underside of the manifold - beneath the thermostathousing - of the watertemp.sensor
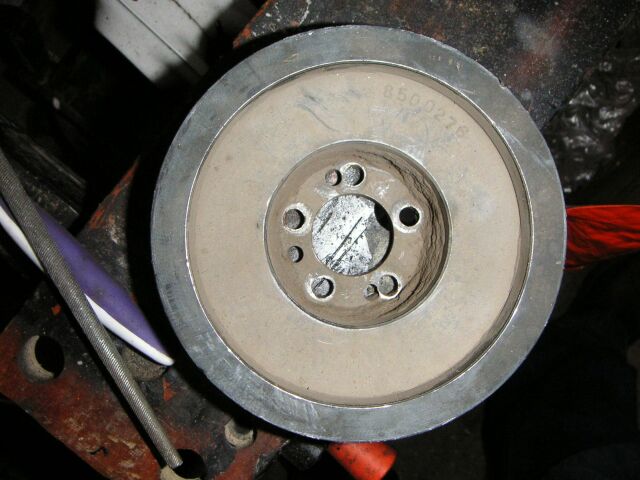
Because the charger is going on a 1600 cc engine now, the pulley bolt pattern from the 1300 ( 4 holes ) has to be re-drilled to the 5 bolt pattern ( already done on mine when I bought it ).
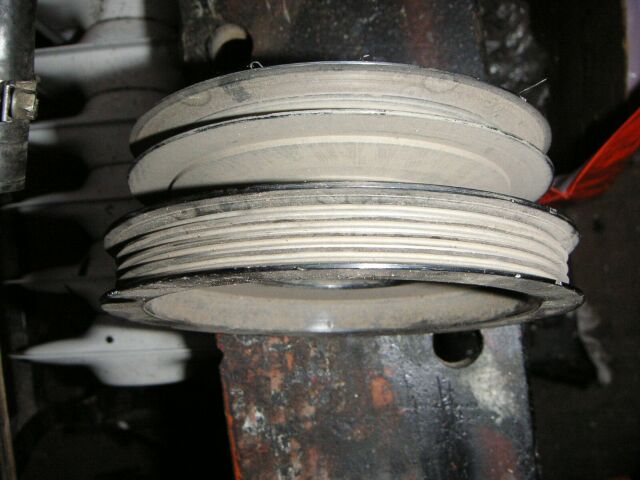
As you can see it's a pulley with a grooved belt for the SuperCharger and a normal V-belt for the generator.
Mounted it on the enigine ( this is the 1600 already, I decided to do it all at the same time, story on the 1300 to 1600 conversion is on another page on my site: Engineswap. )
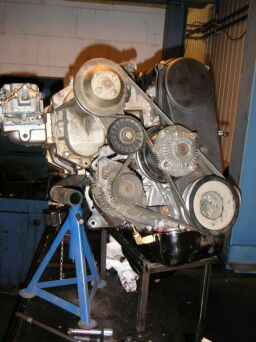
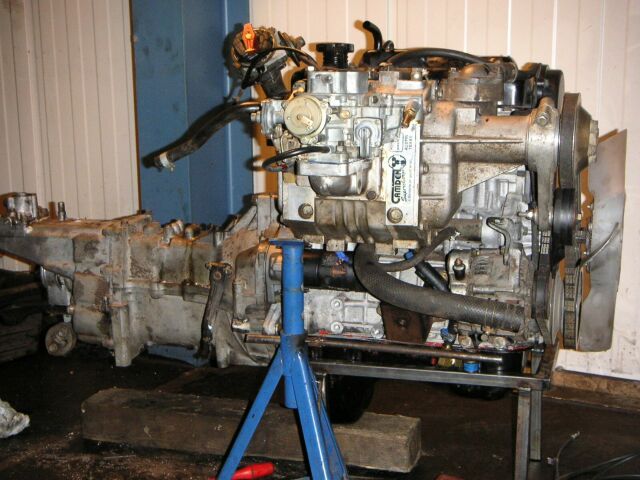
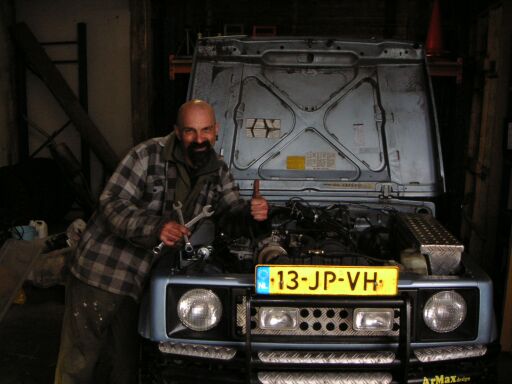
Looks COOL, doesn't it ??
UPDATE 20-02-2005
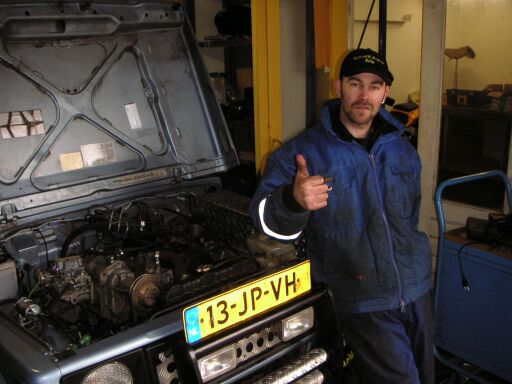
We had the whole combination in the enginecompartment in 15 minutes ( story and pics on that HERE )

and
today we bolted everything up ( loads of wires, hoses and tubes
to be connected ) and started the Zuk for the first time, It revs very
easy, is light on the throttle and
SCREAMS
on
the street. !!!! I'm just a very little disappointed that there's no
"high pitch whine" from the SuperCharger, would have loved
that !!
We did not yet adjust the Weber or the ignition, all the preparations took way longer than we thought, eveytime we looked at the engine we saw a small oil-, fuel- or coolantleak, so we had to re-adjust some hoses and clamps, no major problems.
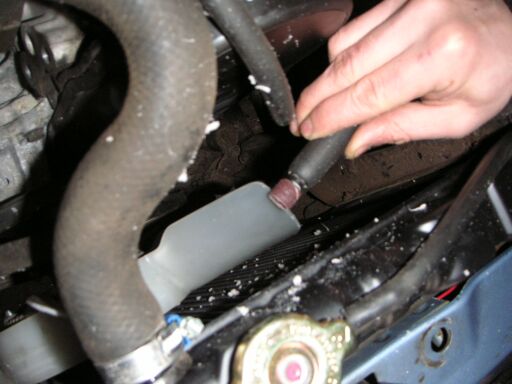
We couldn't get that very expensive selfadjusting fuelpressureregulator to work, tied every thinkable connection, but nothing. Took it out of the fuelsystem, plugged the hose from the electric fuelpump ( through a filter with overflow back into the fueltank ) on the Weber ... et voila !! It ran !! A friend of mine brings his normal fuelpressurregulator tomorrow so I can try that.
Because we saw last weekend that the top hose of the radiator could not be connected due to the fact that the toptube and SuperCharger pulley were only 5 centimeters apart.....
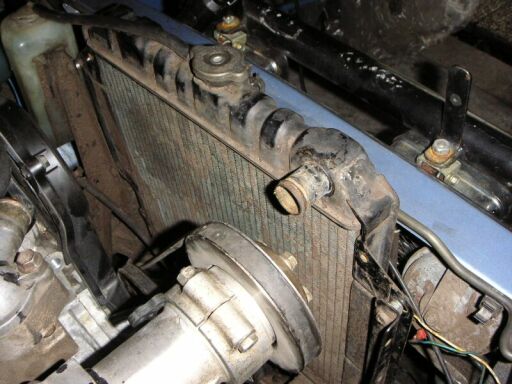
....... I had the toptube moved to the centre by about 8 centimeters ( and had a new radiatorcore installed at the same time ), so they would clear each other. Exactly what it needed !
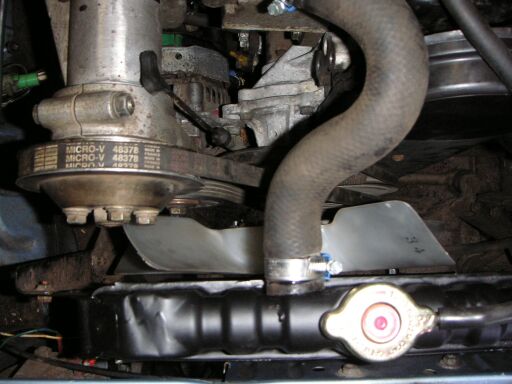
Mustang trimmed the fanblades just alittle, I had spacered the fan with 13 mm spacers so it would clear the bolts and pulley of the Camden, but now it hit the bolts of the pulley and the clamp of the radiatorhose............................not anymore ;-)
It will take some more adjustments before I can really go out and try it ( been around the block just a couple of times today ), but we were very satisfied with the work we got done today.
Couldn't put the K&N airfilter on yet, the hood will not close due to the K&N's height. I'll do a 2" bodylift next Friday.
Made the Bodyliftkit myself so naturally there will be a seperate page on that soon ;-)
You can find the story Larry Harris wrote on installing the Camden on a Samurai on:
http://www.izook.com/tech/samurai/engine/camden/install.htm
This page is merely meant to make the story just that little bit clearer with pics ( I know I needed "some" things explained ;-) ) !