![]()
![]()
ACME ADAPTERS EXTREME HI-STEER
SAMURAI REMOVABLE DOORS
Because I thought it would be cool te have removable doors in my Samura ( and I found nice FibreGlass halfdoors ) I searched the Internet for ideas. This lead to a lot of pages explaining how to cut the standard hinges so the doors could be taken out.
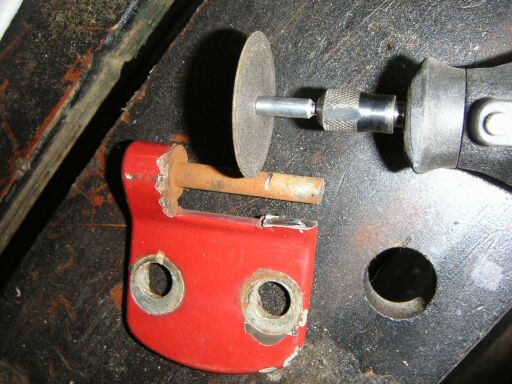
Nothing too it, just buy plenty of Dremel cutting discs and give the ones you are using plenty of cooling time during cutting, taking it from the cut and letting it spin to cool. If not, you'll go through these discs very quickly !
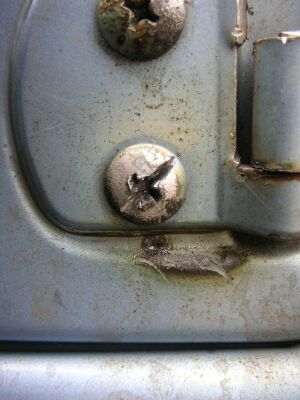
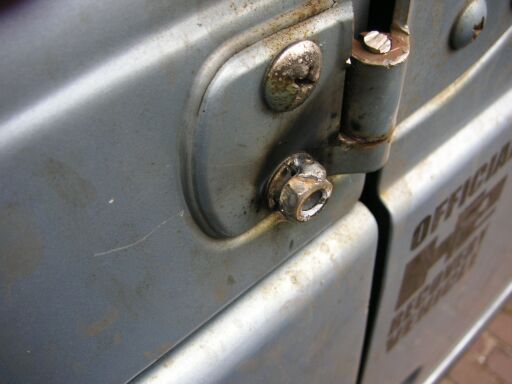
Getting the original bolts out can be a pain, I was lucky with all of them but this one: tried it with a screwdriver and hammer, an impact screwdriver, heating it to loosen the factory LocTite ( cost me the paint on the body ), cutting a straight slot in it for an even bigger screwdriver and trying to hit it with screwdriver and hammer at an angle to turn it, but it wouldn't go. Finally welded a M8 nut to it to unbolt it ( costing less paintwork then heating did ! ). In the picture below you can also see the scratch I made when the srewdriver jumped out of the slot, all in all: go for the welding method, much better !
I cut a hinge I had lying around to try how it would work out and needed an extra set of doorside hinges for my halfdoors anyway.
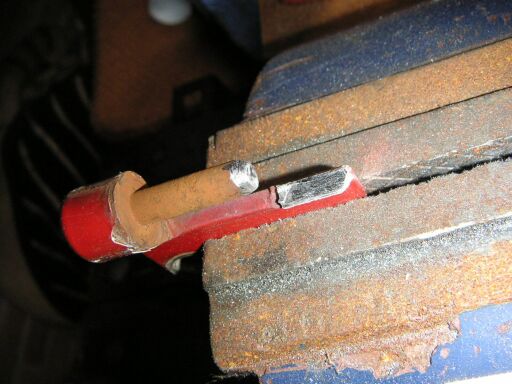
Cut off the top"tube" of the hinge flush with the "bodyside" of the hinge.
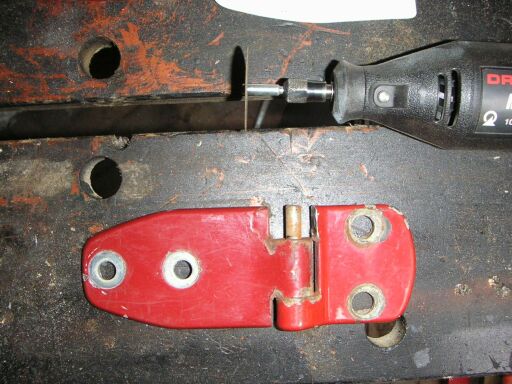
Make a mark on the pin where it's flush with the "doorside" of the hinge.
Take the hinge apart and cut the pin just below the mark you just made.
Tip: leave the pin on the bottom hinge a little longer than the pin from the tophinge, for easier installation, it just aims easier when they are not the same length ( speaking from experience )
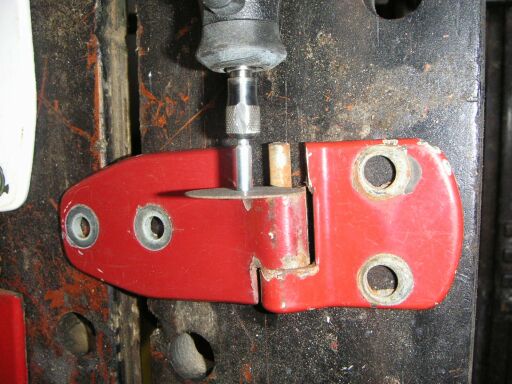
With a grinding- or sanding bit round off the top of the pin for easier installation of the door.
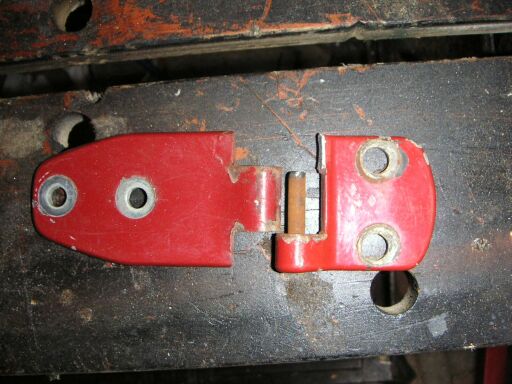
When finished, this is what you'll have:
And here's the halfdoor installed with the original hinges cut :
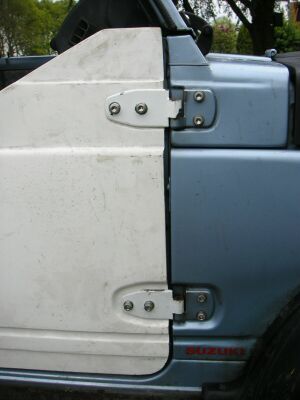
Cool huh 8-)


Of course I needed doorstraps to prevent the doors from flying open and I ordered some "buckle"-system type over the Internet that worked very well and quick
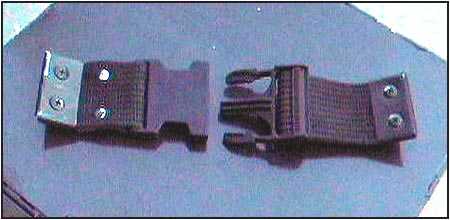
Only problem was the buckles being hard plastic which broke when it was freezing and the door flung open. Rode around with the broken parts for a while, got fed up with the door flying open ( and on one occasion breaking the passengermirror ), so I made my own.
I used the material from the straps I bought, but you could use short pieces of safetybelt instead.
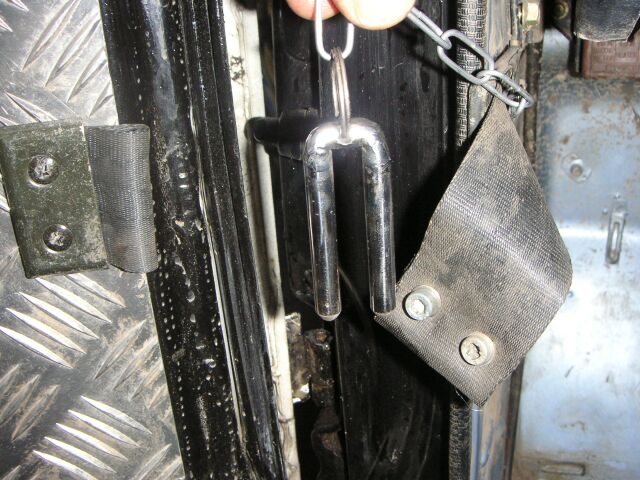
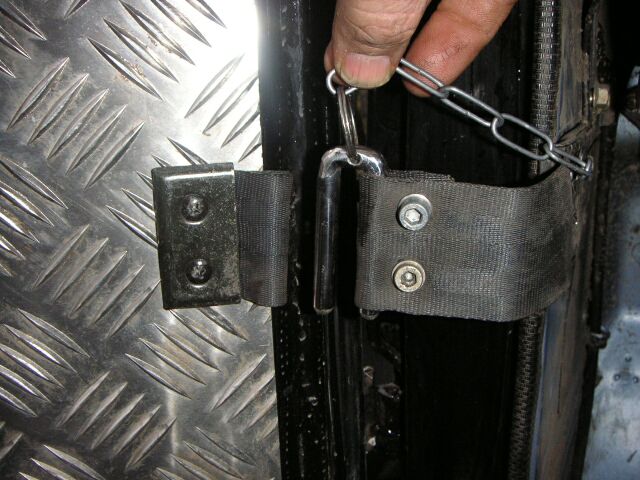
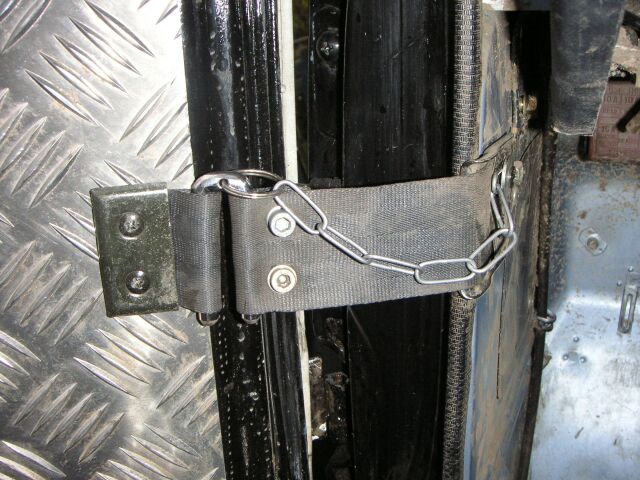
I made a short loop on the
doorside and a longer strap on the body side ( after measuring the
length I'd need with the door as wide as neccasery ) with a loop so
tight that the U-pin I welded was hard to get out. I drilled a hole in
the top of the U-pin for an eyelet and attached the U-pin with a short
piece of chain to the top screw on te body side ( you never know ;-) )
I made the holes in the straps big enough for the bolt with the hot
tip of a solderingiron
Because I expect that rust will become a major problem over the years after cutting the metal hinges I was looking for other options. At an Offroad event I saw someone with Stainless Steel hinges from which the pins could be removed and I really liked that idea. Tried to find a company that could sell them to me, but the closest thing to these hinges were Stainless Steel hinges with a welded in pin ( from the same company that used to make the removable ones of which they stopped production ).
Bought 2 sets of 4 because I needed one complete set for the stock metal doors and one half set for the fibreglass half doors I bought and set to drilling the pins out ( off course with my ever present and very trusty friend Mustang Sally ). With the right tools that was taken care of in ................eerrrmmm......well longer then I had thought before ;-)
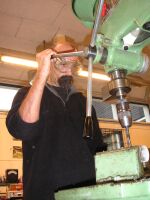
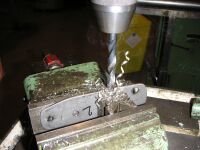
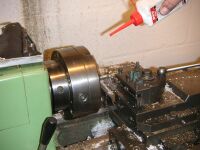
Meanwhile a very friendly colleague of mine machined 4 pins to be re-inserted in the hinges.
Resulting in this:
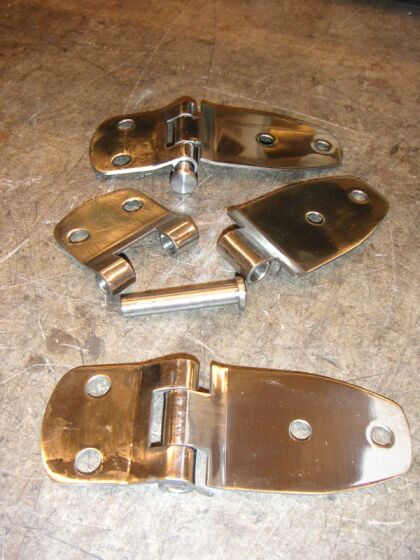
Because we were in a little bit of a hurry ( it was during workhours ) we made a small mistake: the pins are as long as the hinges are high, very tidy but probably hard to remove and impossible to secure ( I wanted them just a little bit longer so we could drill a small hole in the bottom part to secure them with a circlips ). We'll solve that next time by drilling and tapping thread in the bottom part and enlongating the pins just 10 mm.
( and never got to use them, the cut down original hinges work perfectly )