![]()
ACME ADAPTERS EXTREME HI-STEER
1300 TO 1600 SWAP
Of course I had to change the engine as well ( when you've visited my website before you know it wouldn't be long before I'd start on that too ;-) )
After buying the Camden SuperCharger and all the goodies that are available it would be a waste to stick with the 1300 cc engine when there's a 1600 readily available: the Vitara engine.
The guys at www.suzisplace.nl had a low milage engine for me, so I took out the 1300 engine and gearbox as per Haynes Manual......
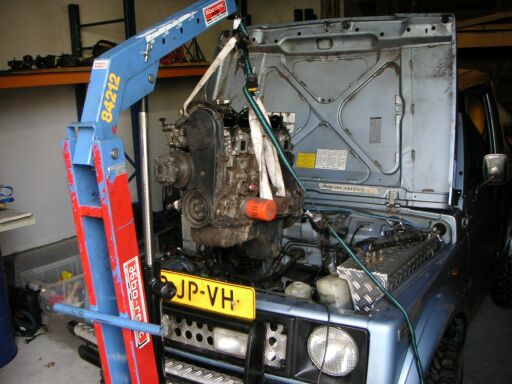
......and took the stuff to their garage to interchange all the engineparts that had to be put from the 1300 to the 1600 engine like enginemount, oilpan ( because of the frontaxle ) etcetc. All this on the Friday ( with help from Mustang ) and Saturday, asking Arno ( the owner, a real nice helpful guy ) for advise or help.
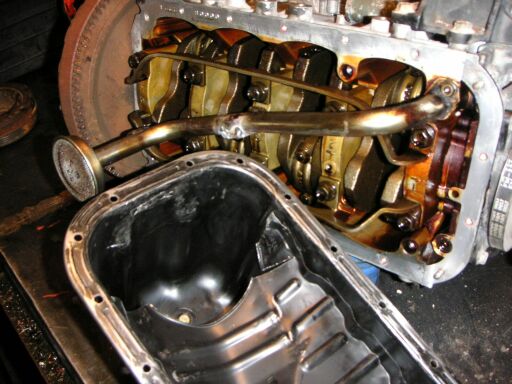
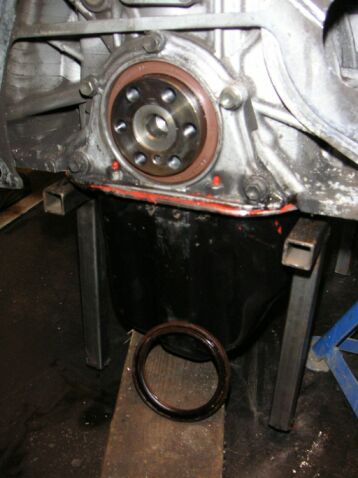
First the oilpan had to be put on the 1600, which only needed minor changes to fit.....eerrrrmmm....NOT, took us ( unexperienced greasemonkeys ) about 1 hour and a half !
The oilpickup had to be shortened and the bracket needed a new place and then we had to use a Big F*ckin'Hammer to flatten the "ribs" at the back of the oilpan because they kept touching the rear cranckcase bolts. We also had to cut out pieces of the flat metal plate inside the oilpan to accomodate the oilpick-up, took several measurements.
When you do this welding of the bracket for the oilpick-up, make sure it doesn't make contact with the conrods when the engine is turning !! Of course ours didn't, due to our exact measurements.......and a lot of luck !
Because of the higher power of engine and SuperCharger we took the clutch of the 1600 with the biggest clutchplate ( 21 cm ) , but because that will not fit in the bellhousing of the 1300, Arno turned the clutch down to the size of the 1300 flywheel, meaning we had to drill new holes and tap thread in them to bolt the clutch to the flywheel.
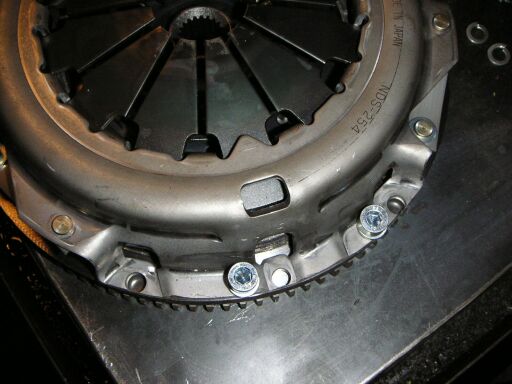
The small "adaptorplate" that goes inbetween engine and gearbox had to be changed too, so a little cutting, filing and drilling later.......
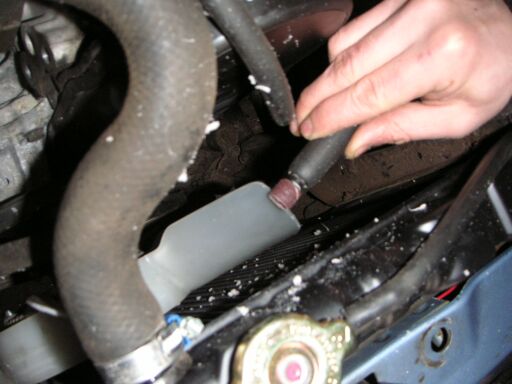
....it fitted. In the picture above - on top of the clutch - you can see the strip of metal cut from the middle of the metal plate ( to accomodate the "box" you can see in the top ). The top right dowel is already in place and the bottom left one cut, so it rests against the dowel. See pic below.
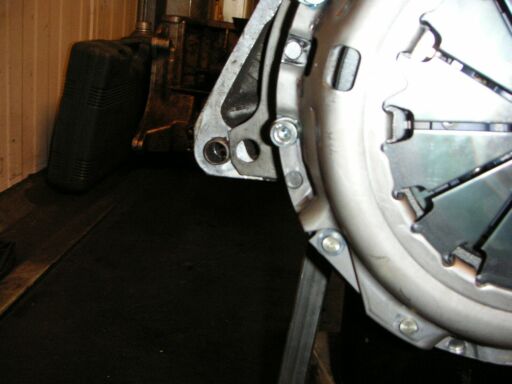
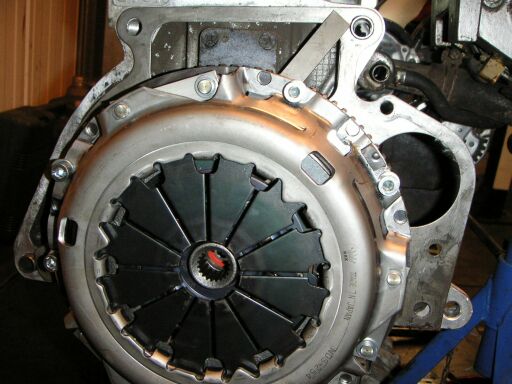
No problem there, just have to close the hole above it, so there will be no dirt getting into the clutchhousing ( I'll make a small metal plate for it and drill and tap 2 holes to keep it in place )
Of course I replaced all bearings while everything was apart
There are loads of suppliers that sell 1600 engine to 1300 gearbox adaptors, but not in the Netherlands and when ordering them from the States they are very expensive ( with all the shipping and taxcosts ), so I asked Arno if he knew something for it. Turns out they do their own adaption for their RallySamurais and he'd do mine too that way.
I was amazed about how simple it actually is:
First drill the top mountingholes of the gearbox to 12 mm and take out the 2 bottombolts ( by means of 2 nuts against each other ) and put them back in the same place, but from the other side, as deep as possible.

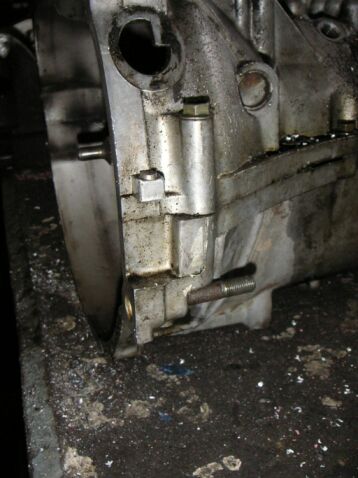
Then take a long bolt and put it in the bottom mountinghole of the engine, the one that is left free because of the difference in engine and bellhousing...
....cut the head off, put a nut on the gearboxside.....
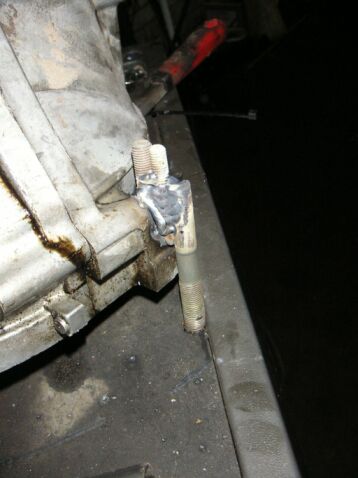
...put a small bolt without head inbetween and tack them with the weldingmachine. Be very sure the long bolt is completely straight or you will never get the gearbox off again !!!
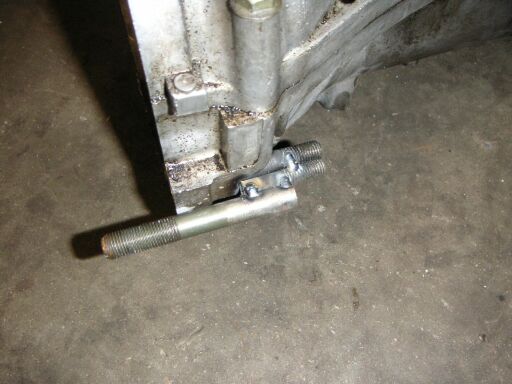
Do the same on the other bottomside, take it all off and weld it, "bridging" the bolts so you get a compact "bracket"
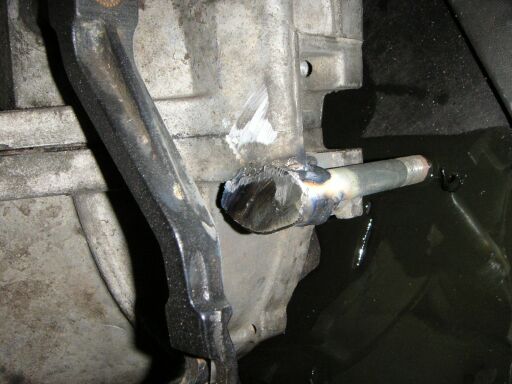
Bolt it all back together and check for clearance.
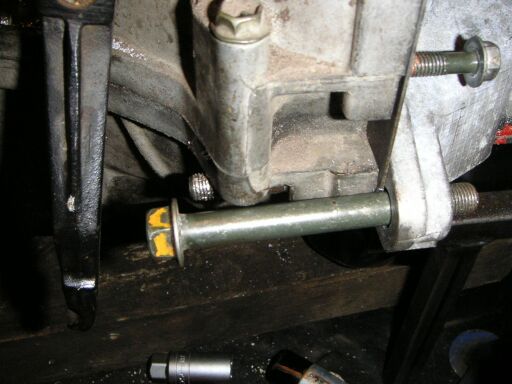
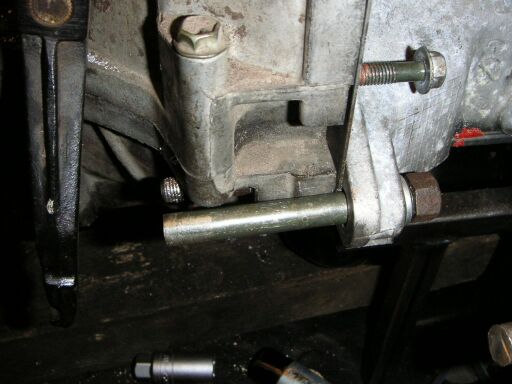
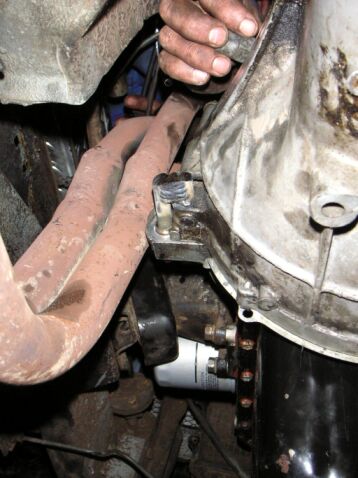
This is what it looks like from the bottom in the car ( and of course Mustang had to stick his dirty paws in the picture ;-) ), it clears the exhaust by millimeters ( of course again due to our exact measurements )
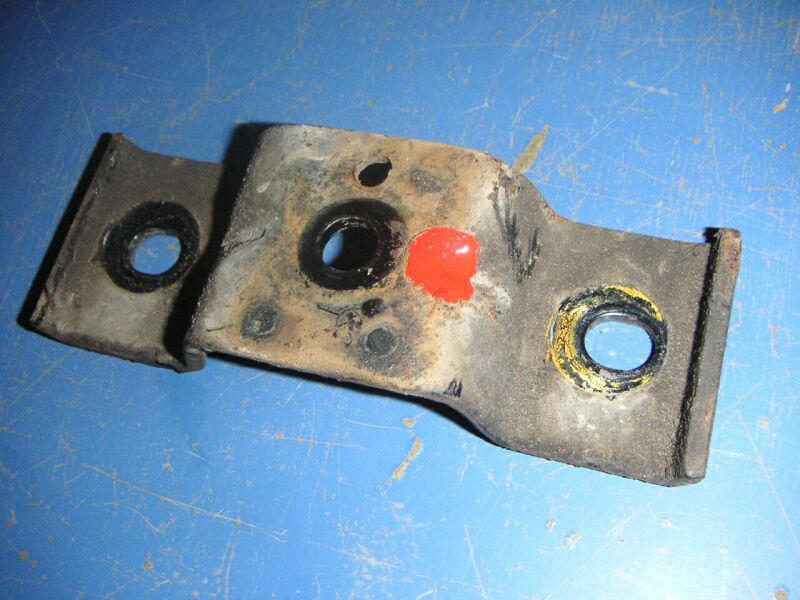
Arno changed the right enginebracket for me, meaning he drilled a new hole in a different place in the old bracket ( after replacing the worn rubber ), shown in the pic below:
Then we had a lot of work installing the SuperCharger, about which you can read more HERE , I will not go into that on this page.
Finished !!
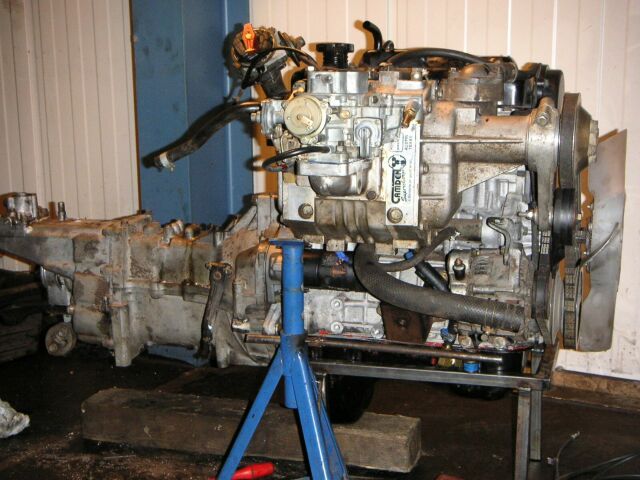
I took the engine to our garage this Sunday ( February 13th ) and with the help of Mustang and Cora ( my wife ) put the engine and gearbox back in. Arno had told me it would be easy to do it with engine and gearbox connected and he was right !! Just some pushing and tilting and in it went, didn't take 15 minutes before everything was aligned !
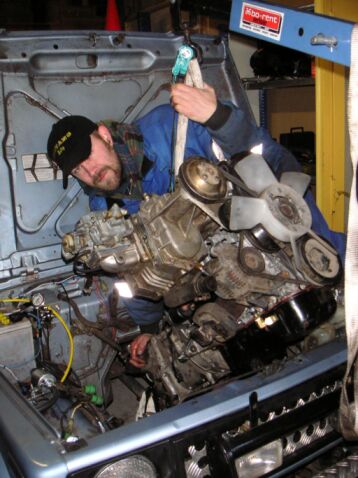
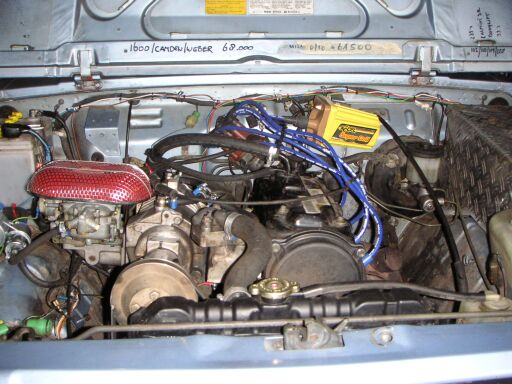
( I later removed that hidious blue jacketed, black capped accessory from the top of the engine ;-) )
We bolted everything up, headers took some time, one of the bolts couln't be aligned, Mustang grinded it untill it fitted.
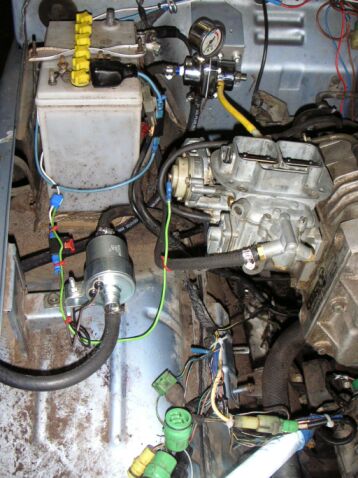
I mounted the electric fuelpump and self regulating fuelpressureregulator for the Camden/Weber combo, connected all the hoses and hooked up all the electrics that were left to connect ( al lot of plugs and wires remain unused after I put on the Weber, I just have to start cutting soon ) ( took the pressureregulater off again, didn't work properly and don't seem to need it Off Road, I did buy a Jeep fuelfilter with return to the fueltank which I mounted just before the carb )( when I later converted to MegaSquirt Fuel Injection I put the regulator back on, it works fine for EFI )
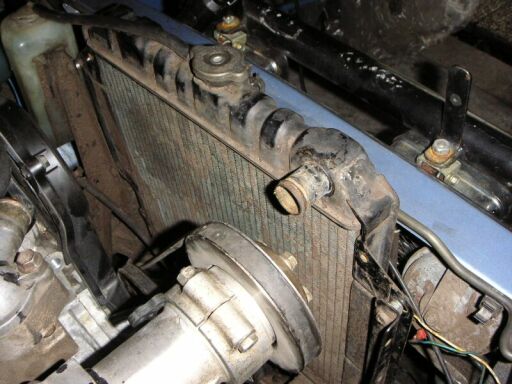
It is in now ( not anymore since January 2006, when I converted to MeaSquirt EFI ), just a lot of small chores to do. Because of the SuperCharger I had the topentrance of the radiator moved about 8 centimeters to the centre, the pulley and entrance are only 5 cm apart.
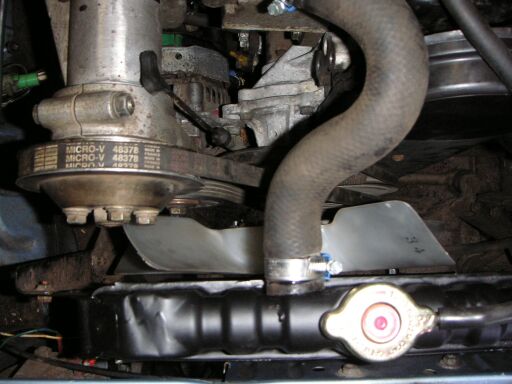
The fan needed 13 mm spacers so it will not hit the pulley/belt of the Camden, but now the fan hit the bolts of the pulley and the clamp of the toptube so some minor trimming was done.
I have a new heaterhose running from the rear of the Supercharger because the original one was too short, and the main concern......................the hood won't close because of the airfilter sticking out too high, so I do need a bodyliftkit !! I'll made my own 2" liftkit from 2x2" square tube, lots of articles on the Web to be found ( and soon there will be one more ;-), with what I haven't seen before, but looks like an easy solution ) ( done: *Click* )
I took it for a testride and man, does this little Zuk SCREAM down the road !!!! Even with the 33's I can easily keep up with traffic on the highway doing 120 km/h and acceleration is incredible ! OffRoad performance is nothing it used to be: I have power in every gear in every rev-range !!!!
Sarge from MidWest Performance told me to buy a Accel SuperCoil and some 8 mm Accel leads to go with the Camden/Weber, so I searched Ebay, found and bought them and before the SuperCoil arrived from the States I was given one by Suzi's Place, they had it laying around doing nothing so I went ahead and made the leads to measure, fabbed some brackets for the Coil and put it in the enginebay

Amazing pick-up on throtlle and together with the red RamFlo aitfilter ( also from Sarge it's nice and colorful now ;)
( but again, since the MegaSquirt conversion it looks different again now )
More HERE on the Camden installation.