ACME ADAPTERS EXTREME HI-STEER
MEGASQUIRT CONVERSION

After a lot of fiddling with the Weber, without ever getting it to run properly for a longer period of time ( despite all the good advice from Sarge ) and having the manifold between the Weber and the SuperCharger freeze up ever time the temperature dropped beneath 7 Celsius:
I decided to convert to a MegaSquirt injection system for the Zuk. My friend Niels had already built this system on his VMax and is working on a conversion for a Dragrace GSX1200 and a Dragrace Chevy V8 and told me I'd better do this too ( with a lot of help from him ;-) ). He was about to order a new batch of computers and stuff and I agreed to take that big step too.
This means a lot of changes have to be made.
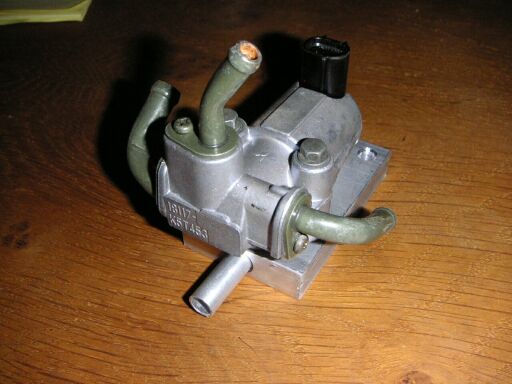
I've got a throttlebody, injectorrail and injectors from a Vitara 1.6 16V and a big electric fuelpump from ( I think ) an Opel courtesy of - of course - the guys at SUZI'S PLACE:
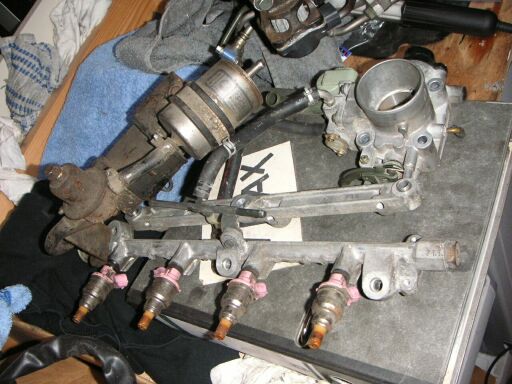
and because we couldn't find any info on these injectors we had to see what they deliver fuel-wise the "redneck" way:
We put the whole lot together with some wires and fuellines, hooked up the pump and regulator ( on 3.5 bar ) with one injector and ran it for one minute, then measured what it delivered
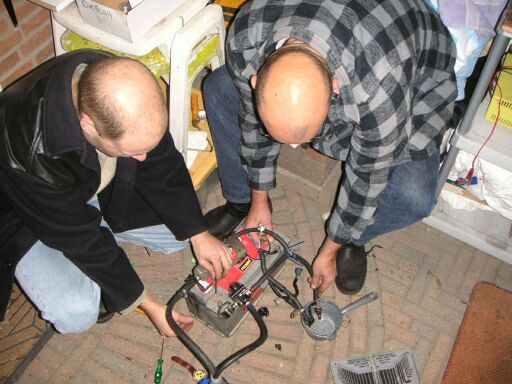
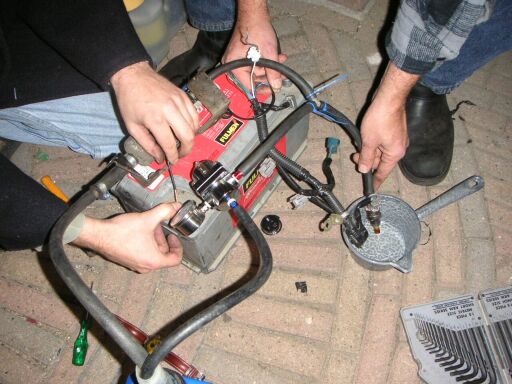
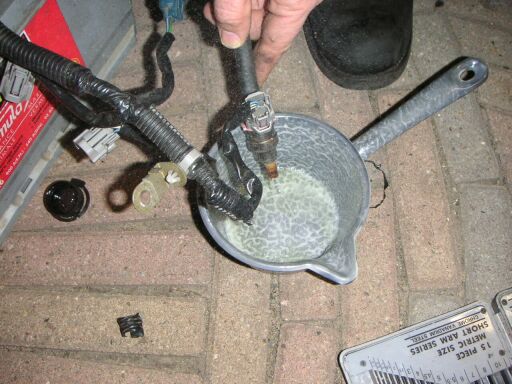
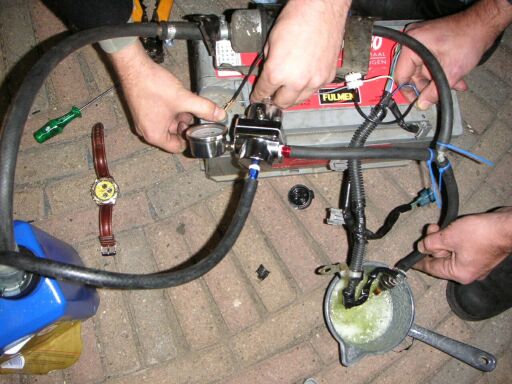
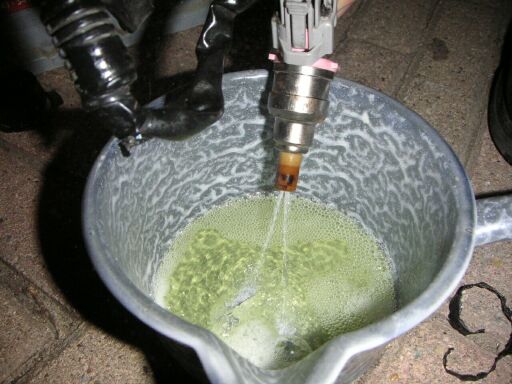
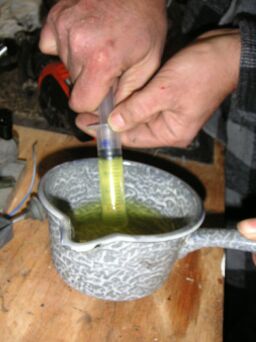
Turned out it produces 175 ml a minute, good enough for now !
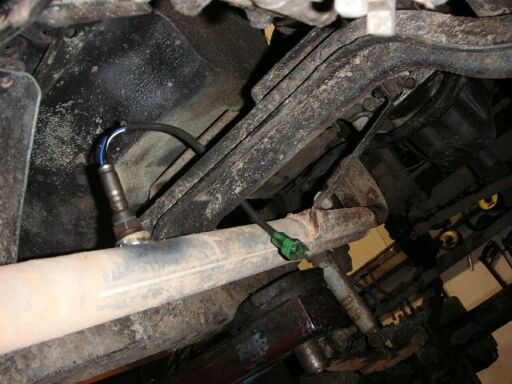
I drilled a hole in the exhaust and welded a M18 nut onto it for the Lamdasensor, I'll have to protect the wiring coming from it with some tubing or something or it will get ripped apart OffRoad I guess.
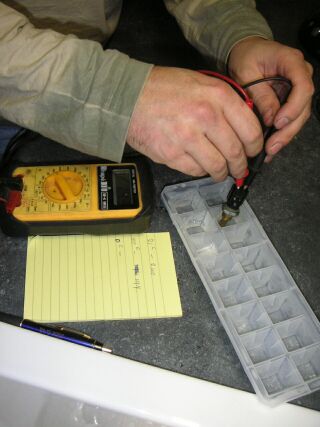
To get all the right parameters into the computer we checked all the sensors, like the watertemperaturesensor. First at roomtemp., then above the steam of boiling water and finally measuring the values in water just below freezing point. Niels will put these three measurements into the computer which wil calculate all the needed info inbetween by itself.
I put the Zuk on the Dyno today ( 20-12-2005 ) to see what it produces now and will put it on the same Dyno again when were finished to check performance after the conversion. Outcome was not too bad, considering the Weber ran crap today:
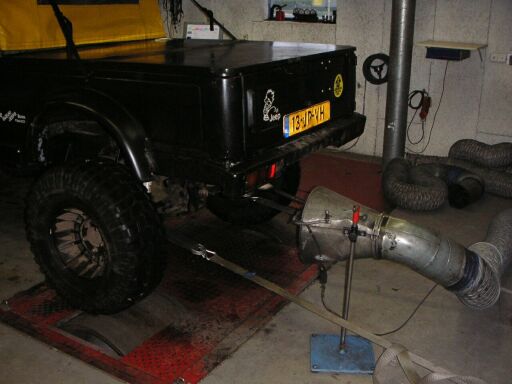
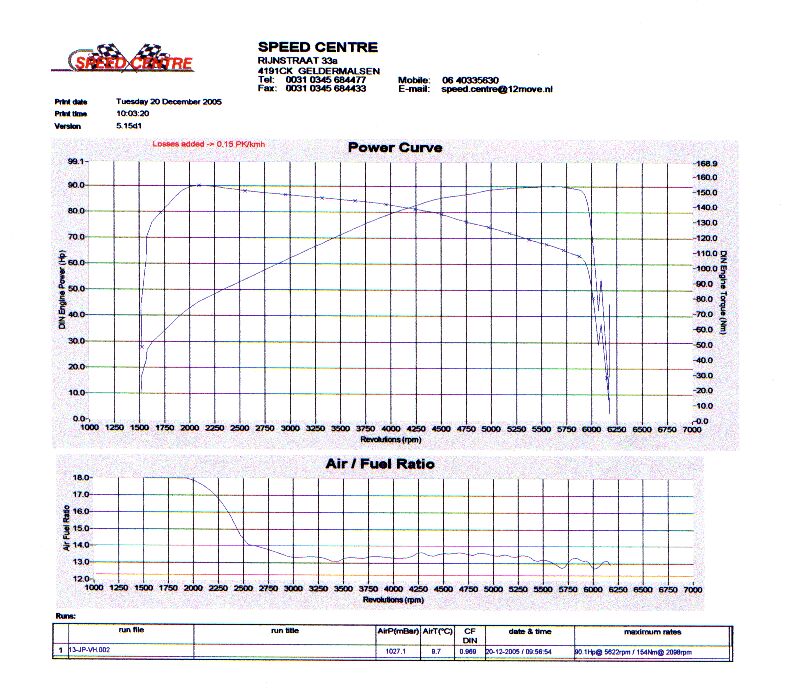
90 HP @ 5622 rpm and 150 Nm @ 2098 rpm at the cranck !
( loss added for Rearwheel HP = 0.15 )
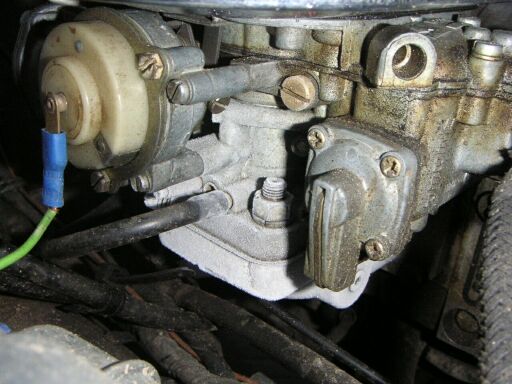
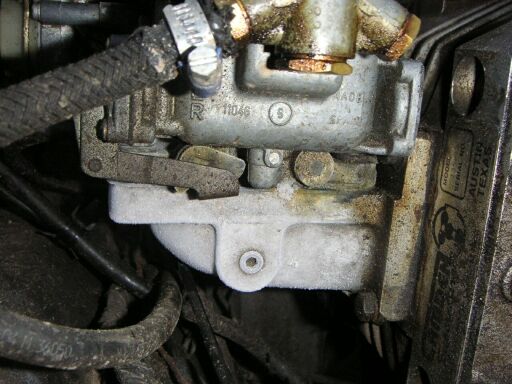
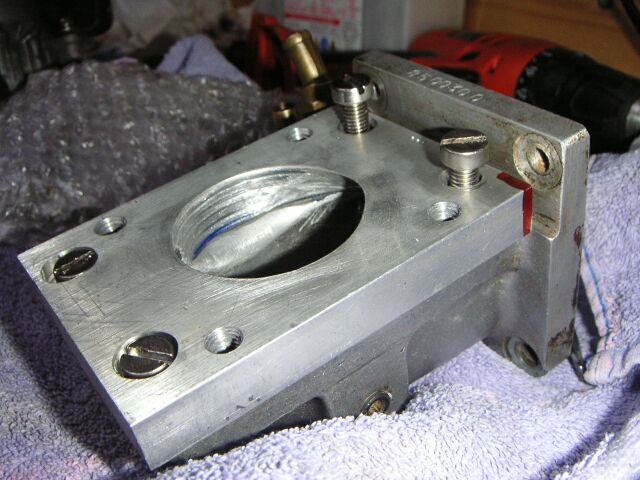
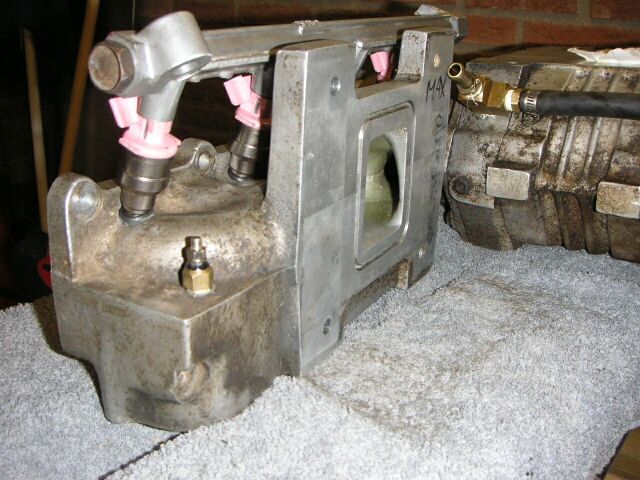
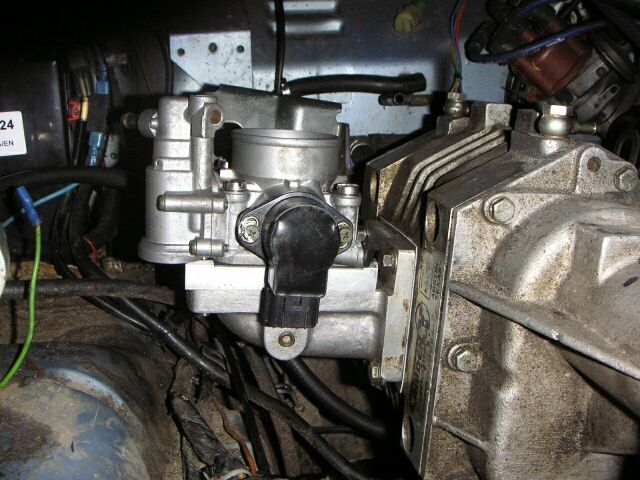
Of course I needed a ThrottleBody instead of the Weber, I got one from a Vitara/Kick with a 50 mm diameter ( we calculated that we'd need one that size from the MegaSquirt site ) and I had to make an adapter to mount it to the Camden intakemanifold between Throttlebody and SuperCharger.
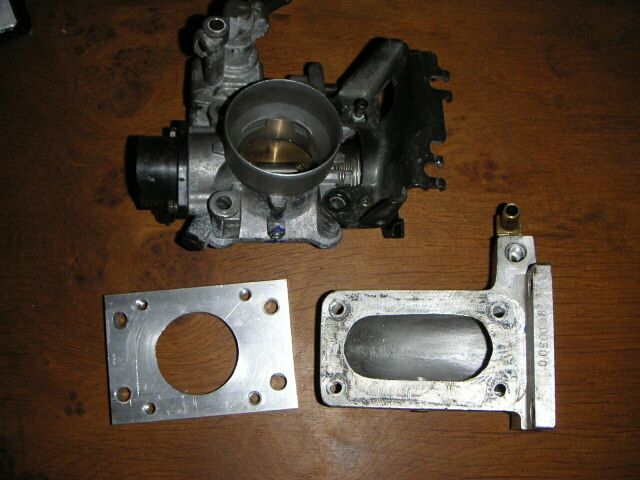

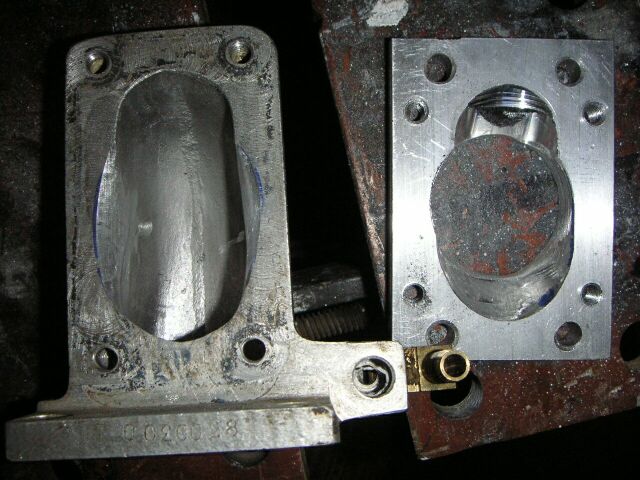
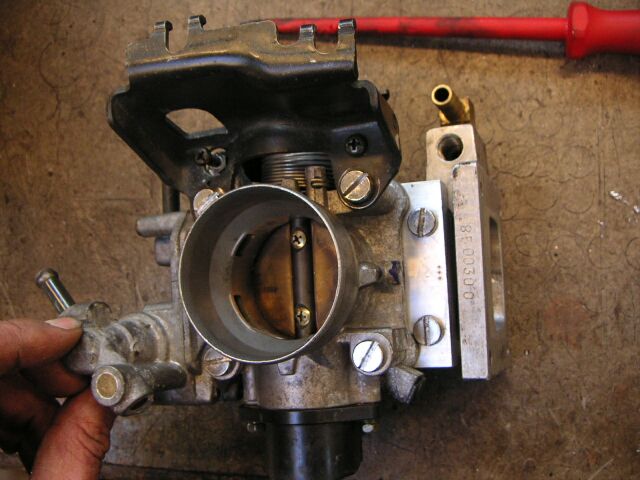
In the pics above you can see the 9 mm holes to mount the adapterplate to the intakemanifold ( which had the studs for the Weber before, I've drilled and tapped those for new M8 HeliCoils ) and the 4 M8 threaded holes to mount the Throttlebody to the adapter. In the 3rd picture you can see I've filed away all excess material going from the 50 mm round TB-hole to the oval hole in the intake manifold. I've made new gaskets and used Blue silicone gasket to prevent leakage.
Adaptorplate is only 15 mm high, together with the lower ThrottleBody compared to the Weber, providing more space for an airfilter/snorkel.
The outer 2 holes have the space for the boltheads reccessed so the ThrottleBody could be mounted flat ( left picture ), you can see the inner 2 bolts on the SC-side just in front of the ThrottleBody in the pic on the right.
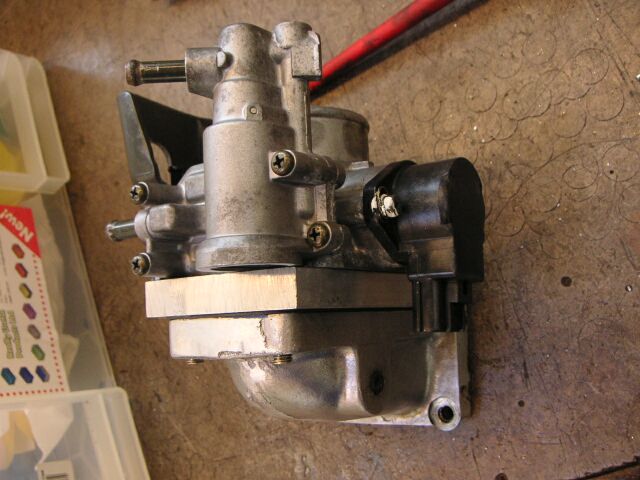
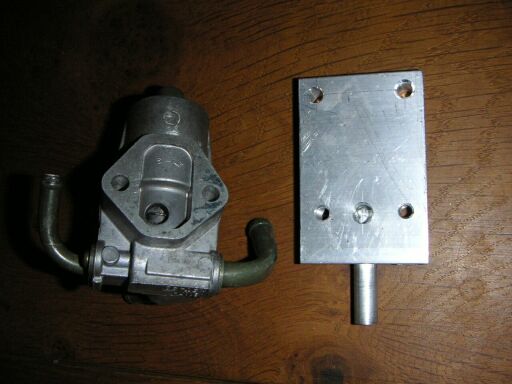
I've made an adapterplate with internal 7.5 mm tube to mount the "Hi-idle" valve, it's normally on the intake manifold but there's no space for it on the Camden intake manifold.
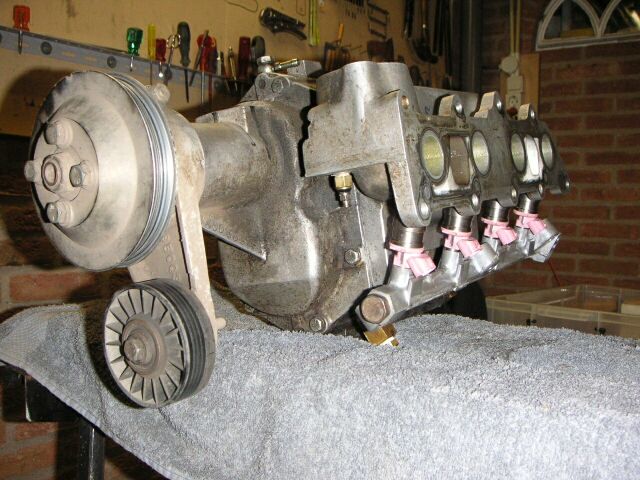
I then bolted both adapterplates together, hoping to create some room under the hood and also to keep the hoses as short as possible:
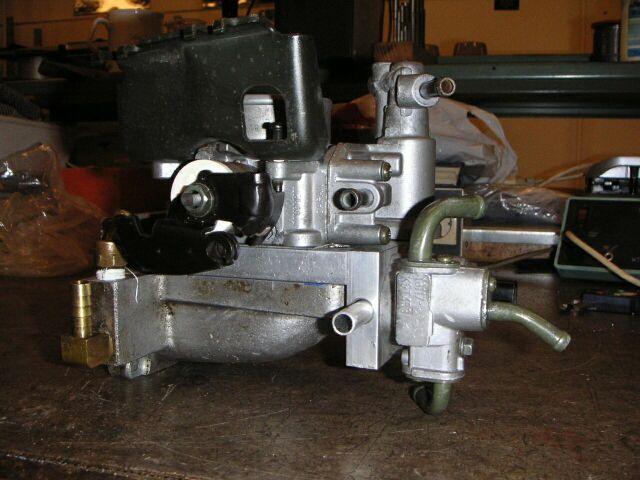
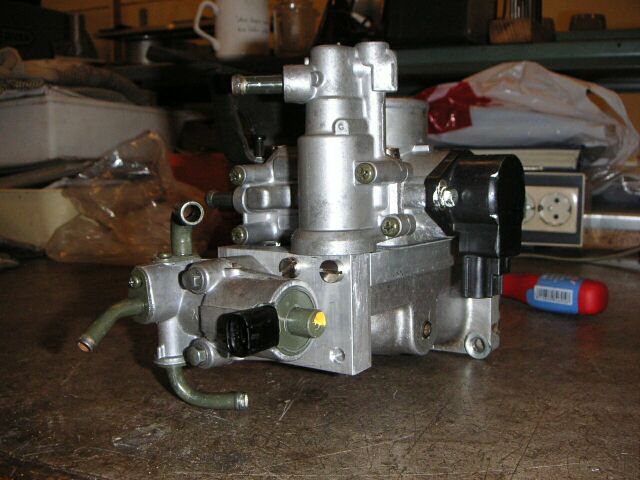
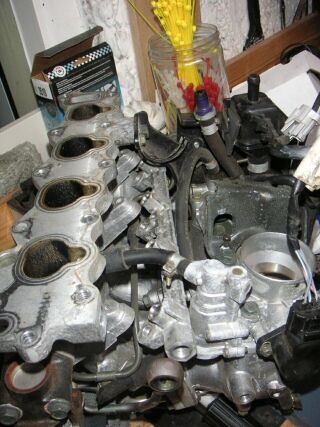
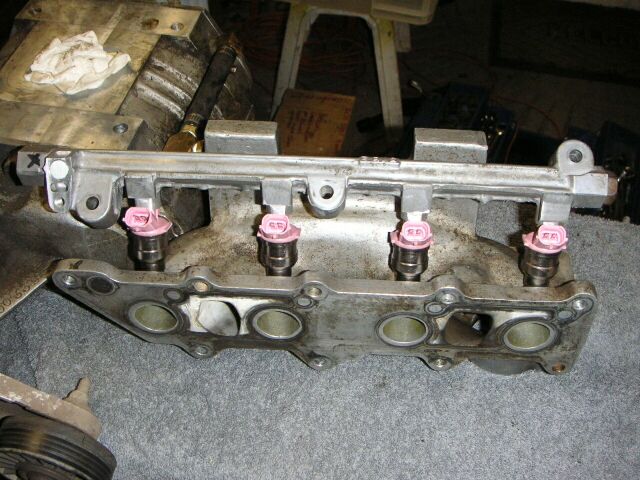
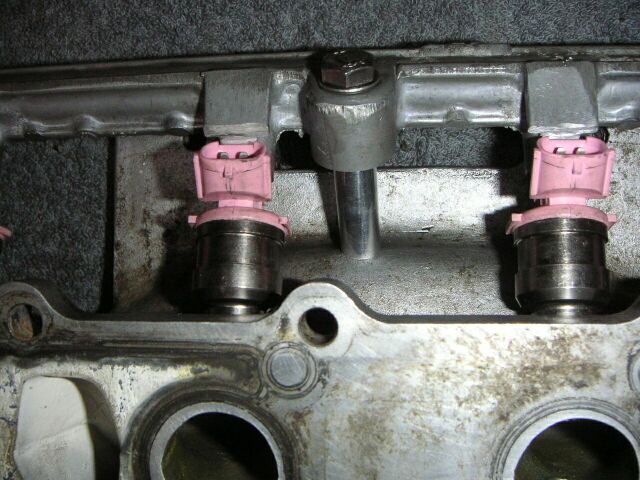
There's no room for the injectors on top of the manifold between SuperCharger and engine due to the coolantducts. I had to see if I could fit them underneath and after a lot of trying and measuring Niels and I were confident it would fit so I took it all off.
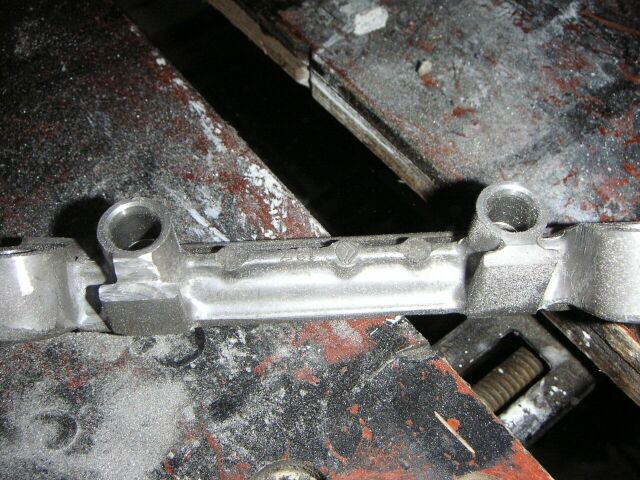
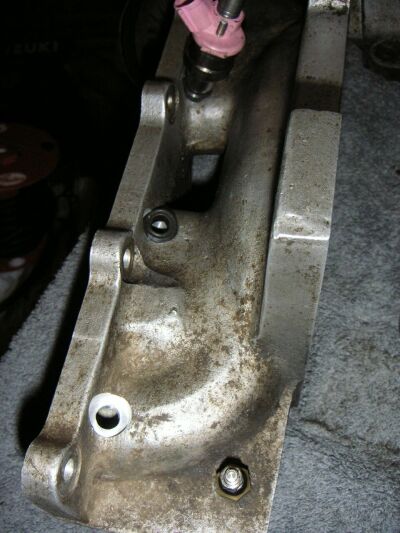
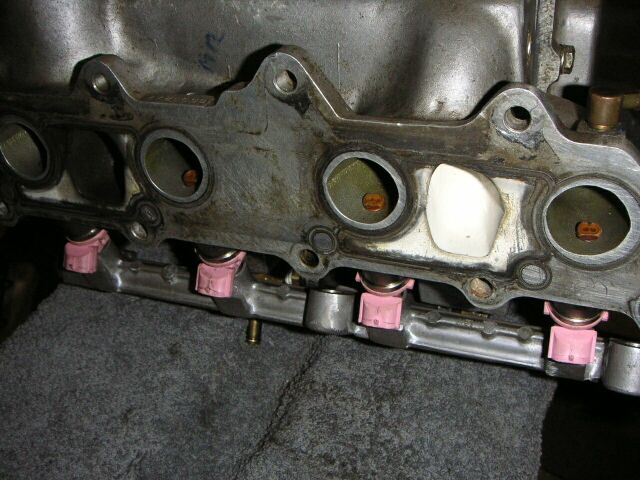
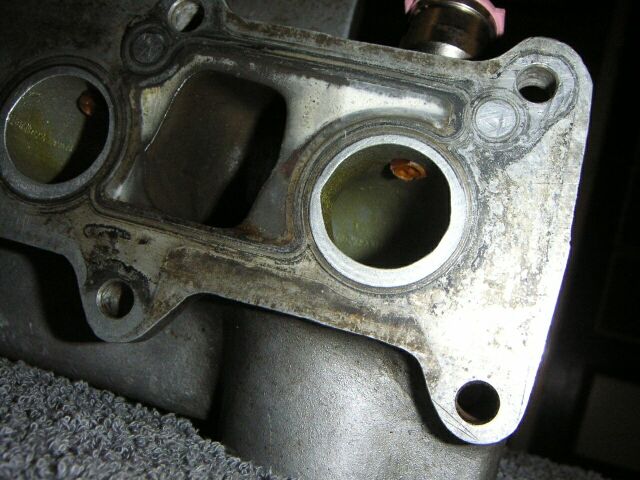
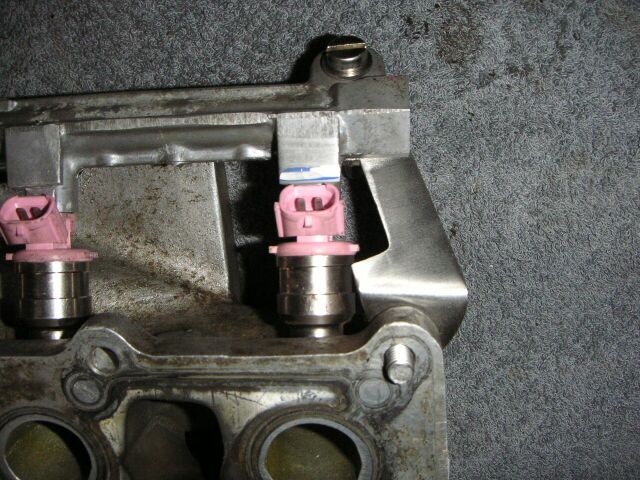
I've taken off the original fuelpressureregulator and will replace it with the fancy selfregulating one I bought some time ago ( for use with the Weber on which it didn't work ), so I had to plug the hole were it used to be. Since I need all the space I can get underneath the intake I'm going to cut off the "ear" on one side ( top one on the pic below ).
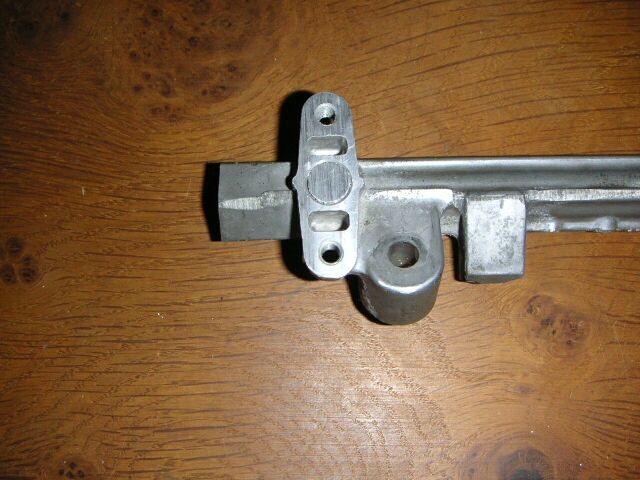
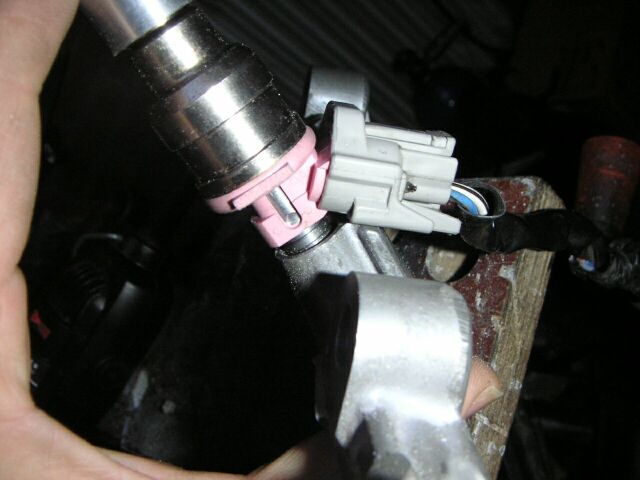
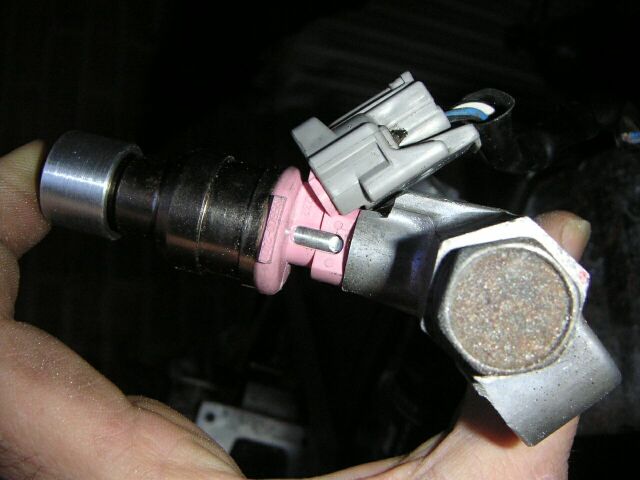
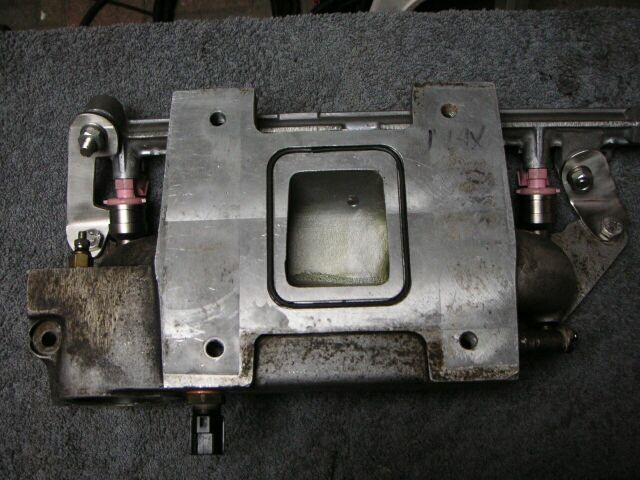
Because I mount the rail upside down I needed to turn the injectors and their plugs 180 degrees so I also needed to cut off excess material from the rail where the plugs hit the rail:
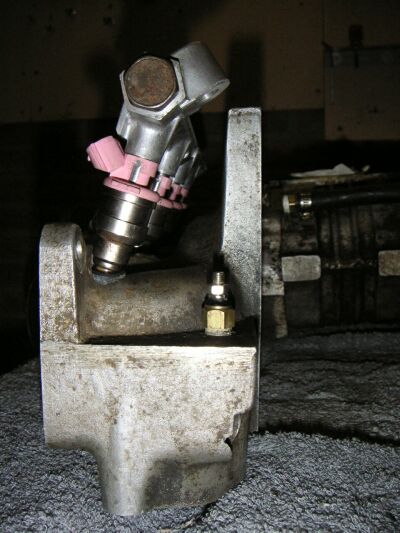
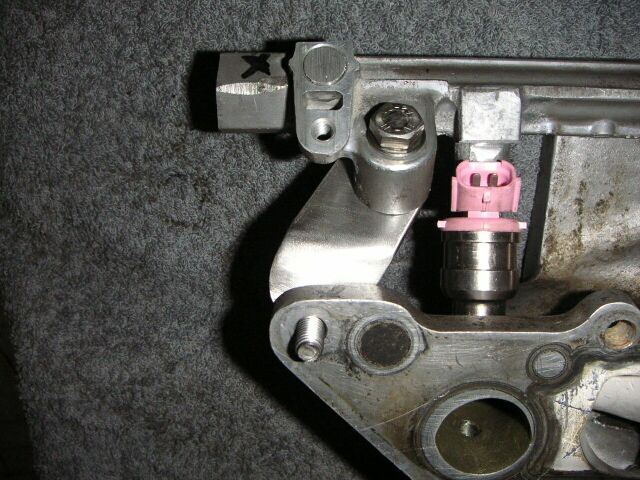
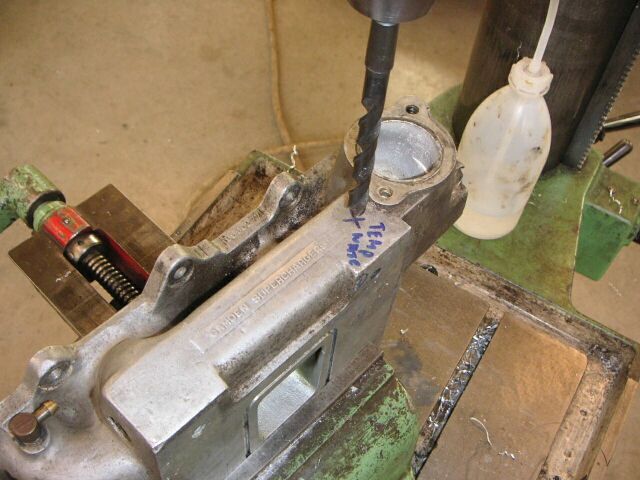
Otto at the Metalworkshop at the place I work machined a bung for one injector from drawings made by Niels to see how everything would fit:

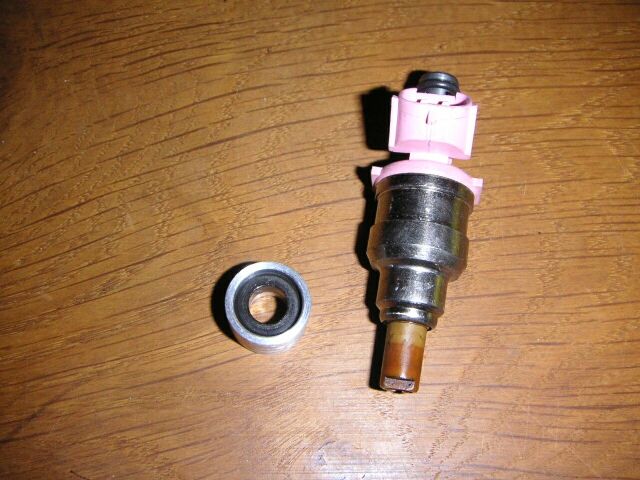
but we found out the mill from the workshop couldn't reach the full length of the intakemanifold, meaning we'd have to take the manifold out at least one time and re-adjust everything to be set up perfect for the fitment of all 4 injectors, so I took the manifold, injectors and rail to a CNC Millingshop nearby from which the owner also knows a thing or two about tuning and he came up with this in the following pics. In the first pic the front hole is bare, second hole's got the rubber ring in and the third one's got the injector in:
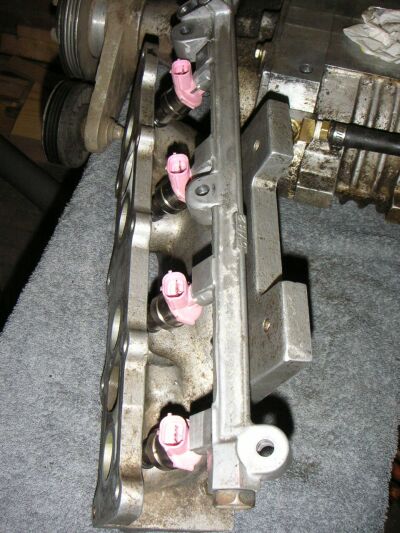
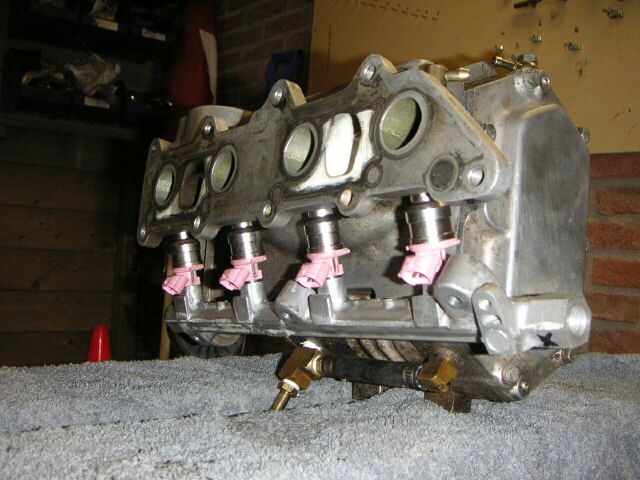
We'd prefered the injectors at an angle of 45° , but he could only manage about 32°, good enough we figured. In the last pic you can see the nozzle from the injector sticking into the manifold.
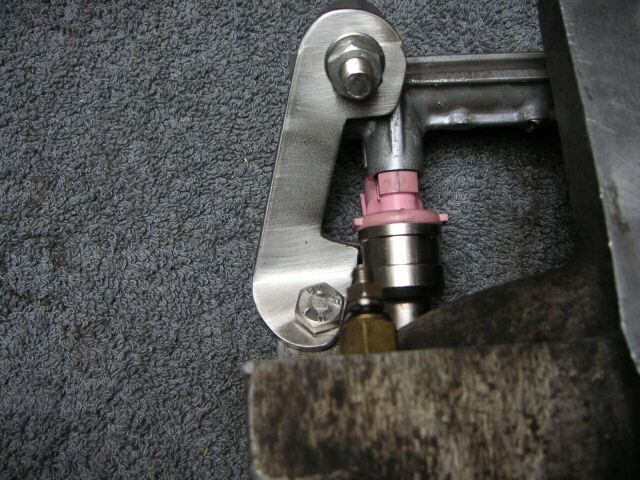
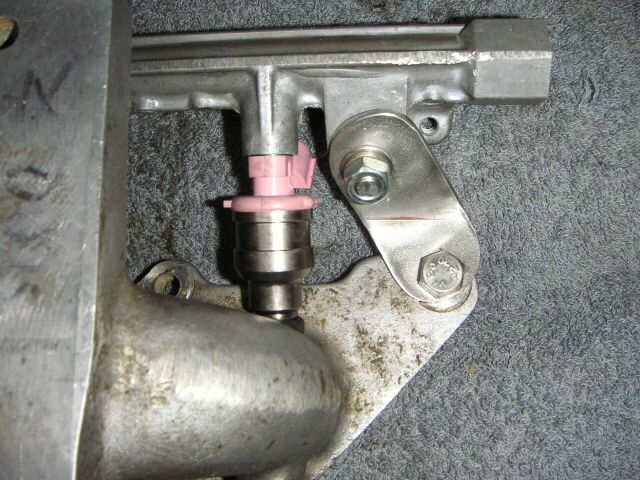
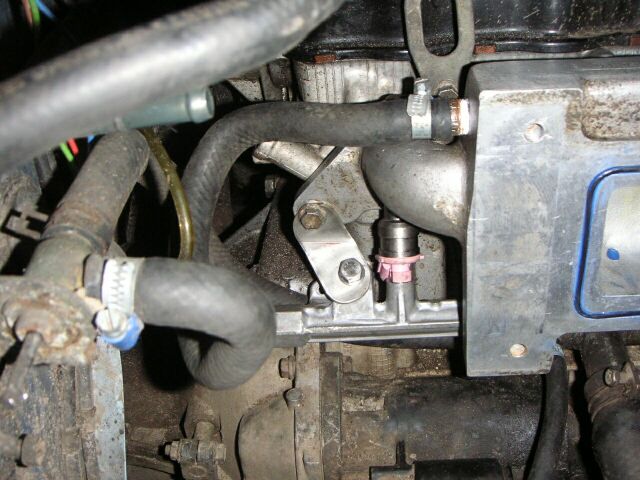
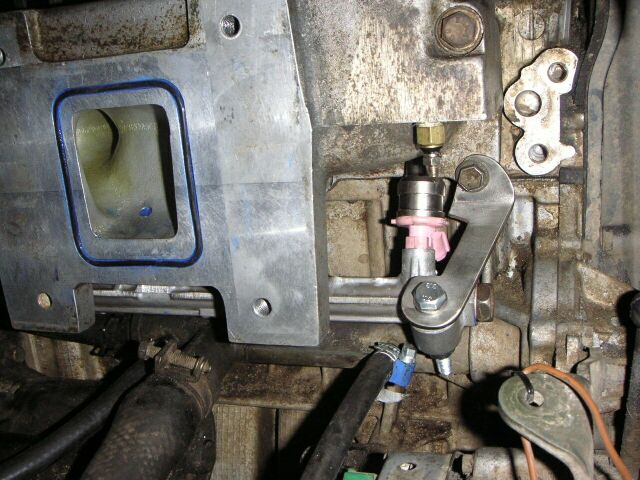
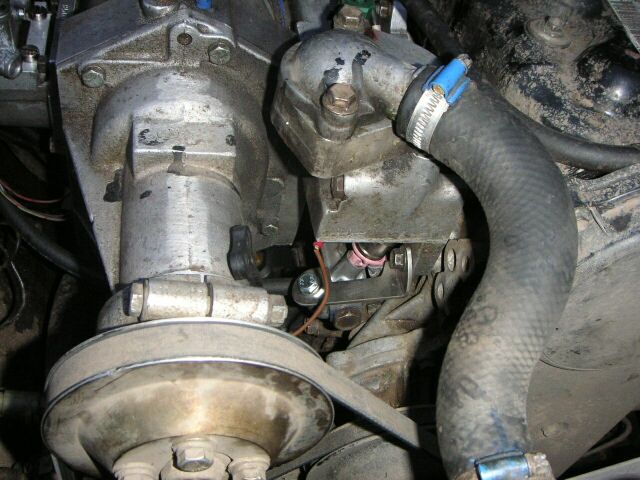
Making the bracket to hold the rail and injecors steady and pushed against the manifold wasn't too hard. I've drilled and tapped an M8 threaded hole in the intake and stuck an M8 bolt through the middle mountinghole of the rail ( with a piece of polished aluminum tube for good looks ) and since the outer mountingholes of the rail are very near the mountingholes of the manifold I've cut and bend some flat pieces of Stainless and bolted them down with the intakebolts
I've drilled and tapped M12 x 1.5 thread into the coolantduct on top of the intakemanifold between the TB and Camden for the watertemp.sensor and a hole with M12 into one of the intakeducts for the airtemp.sensor.
Couldn't find the T-pieces I needed so I made them myself:
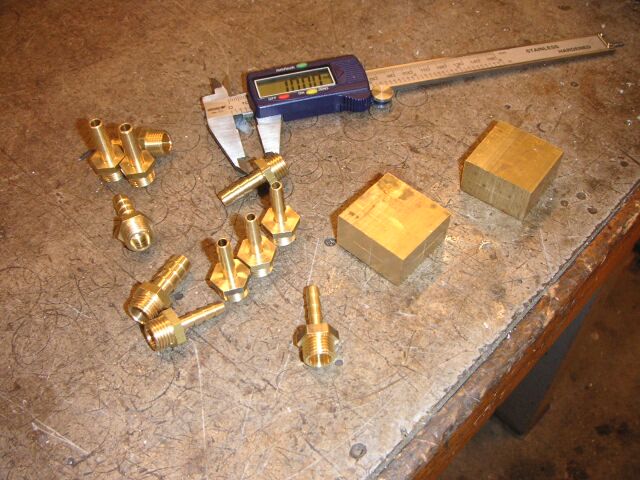
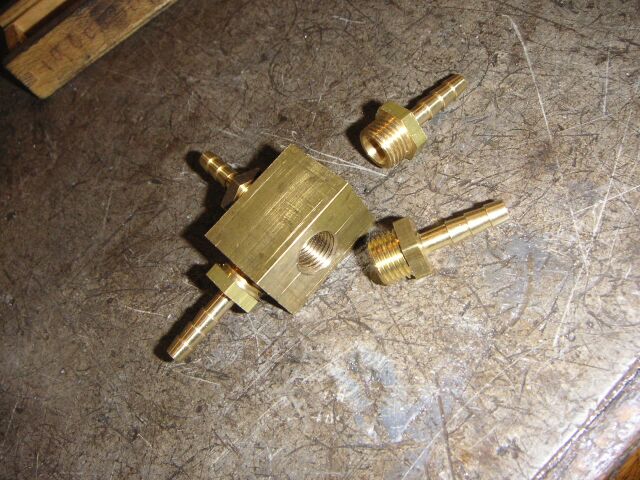
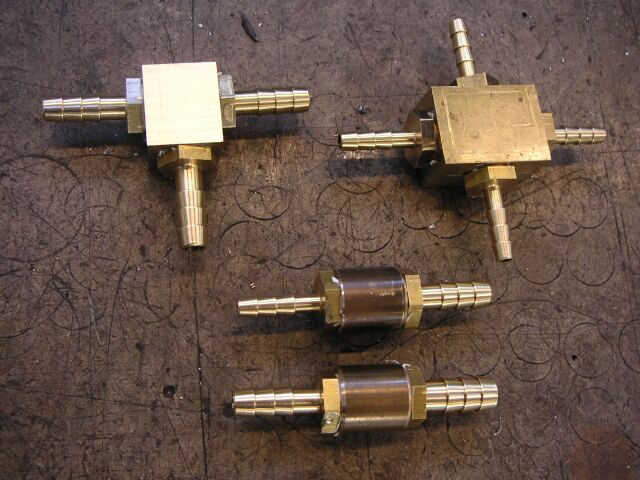
I must admit that the one with the 4 connectors could have been a little more "suble" ;-) but it was a first for me too.
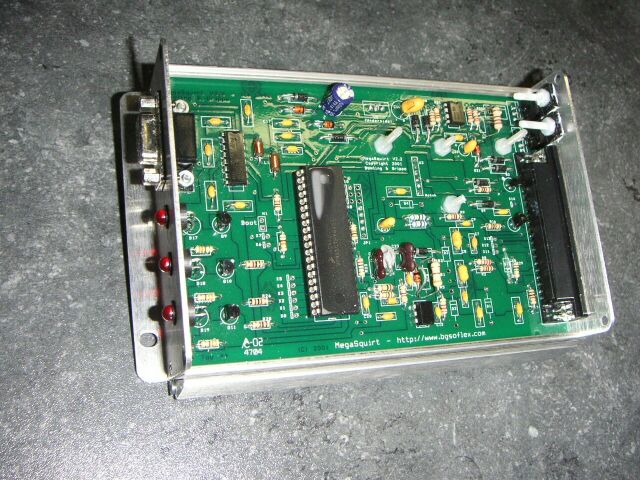
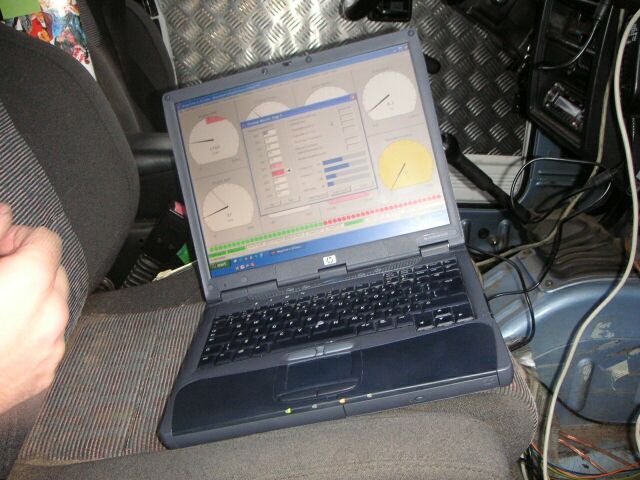
Niels came by with the finished computer for the MegaSquirt system, he's already got most parameters in the laptop, so it's now a case of bolting everything back on the Zuk and connect all the wires to all the sensors and see what happens.
Today, last day of 2005 I spend a couple of hours in the freezing cold to put everything back together on the engine. Getting the injectors in and the rail on wasn't as straight forward as I had hoped. All nice and smooth with the stuff apart on the workbench, but it's different with all the hoses, sharp edges of Ty-Wraps and other stuff in the way !! Finally got it on and it's a perfect fit, with just enough room for wires and plugs.
Sadly my plan with the 2 adaptorplates bolted together didn't work, the Hi-idle valve touched the inner fender bigtime, so I bolted it to the firewall. Well, enough holes in both firewall and adaptorplate, so I can change it again when it's not satisfactory ;-)

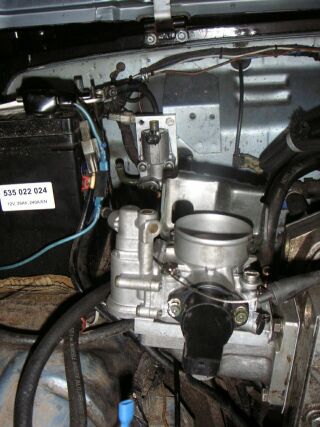
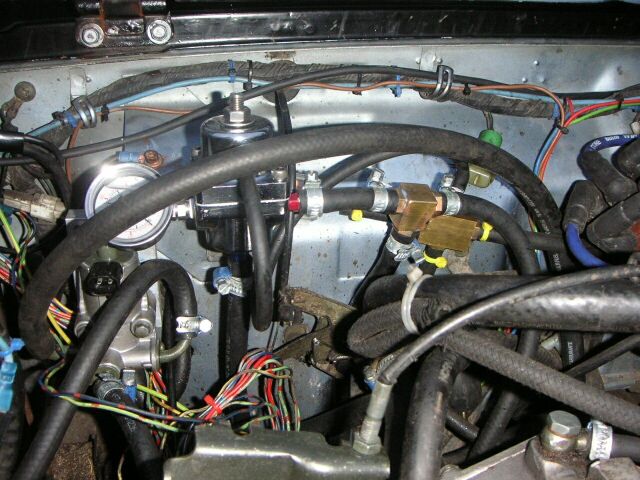
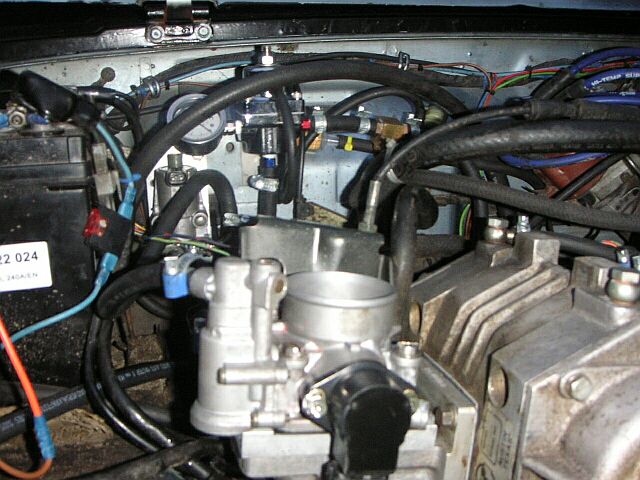
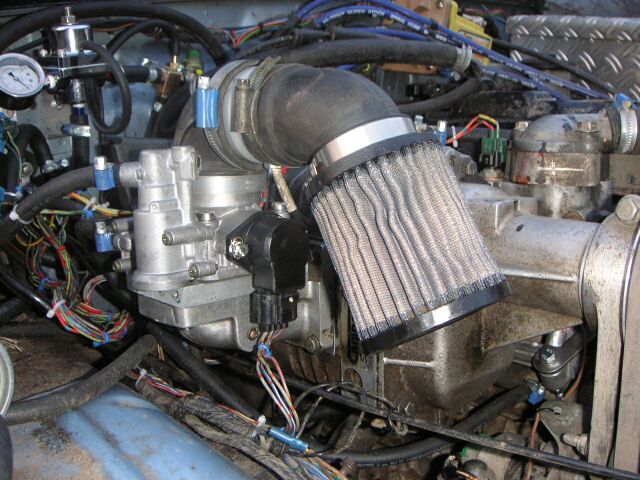
Here you can see everything installed under the hood:

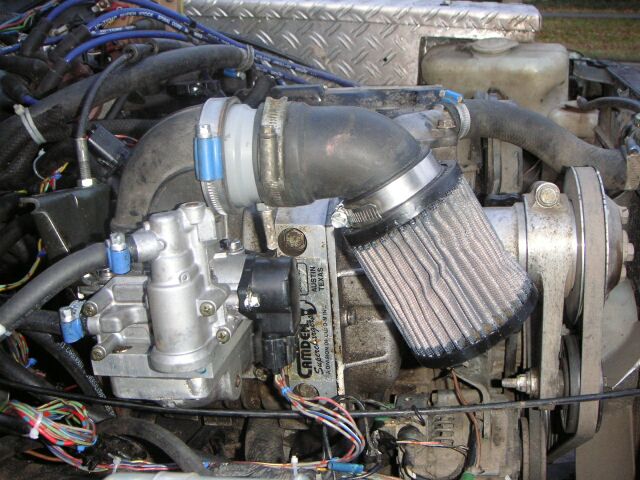
For now I have this old motorcycle K&N airfilter on a piece of 60 mm PVC pipe and 2 pieces of rubber I found on the secondhand partsshelfs of www.suzisplace.nl to protect the engine from the sand and dust, but I will have to figure out a way to make it fit into some kind of "container" to connect it to a snorkel
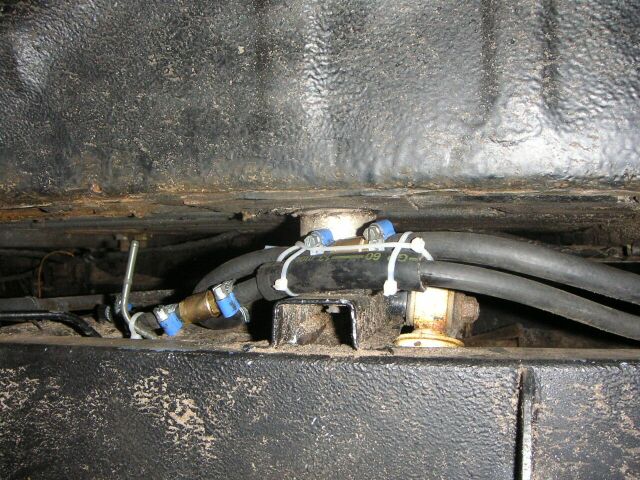
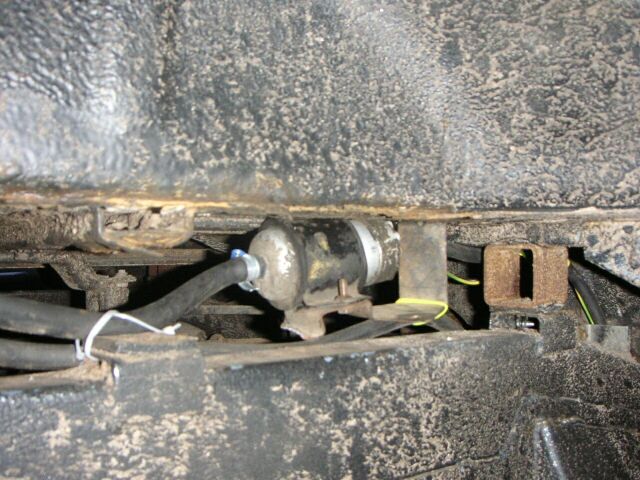
Fuelsupply is through a 8 mm to 10 mm hose to the fuelpump which is on top of the framerail ( possible thanks to my 2" bodylift ) just in front of the right rearwheelweel, connected to the original fuelline with a piece of 8 mm hose up to the fuelfilter you can see in the 3rd pic above the K&N pics. Fuelreturn is through the selfregulating pressuregauge and back to the tank through an 8 mm hose which goes into a 6 mm hose just before the fueltank to connect to the original returnline.
Then all that was left was hook up some wiring and do some tuning/testdriving ;)

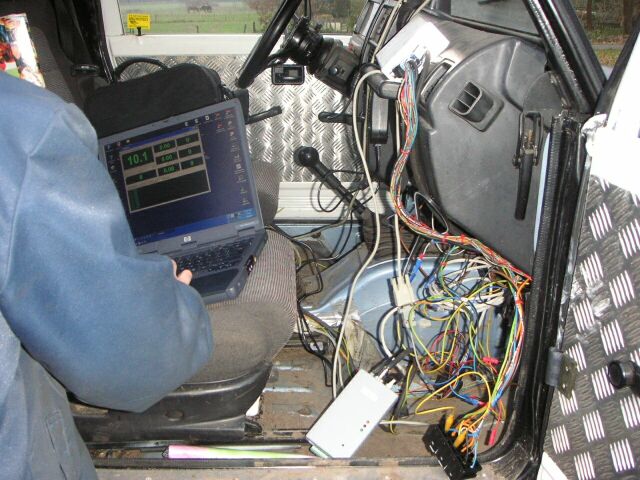
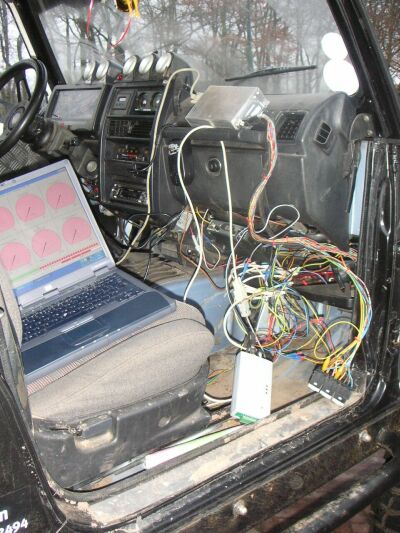
It started up fairly quickly and then it was with some trail and error we got it running properly. The Hi-idle valve did not shut after warming up because of a big airbubble in the cooling system so that was corrected easy enough ( after a fountain of Fluo-Pink coolant all over the place ;-) ). It runs @ 1400 revs on warmup and goes down to 950 revs when warm. After having it start and run properly with the coolant warm, we then went for the throttle-response, once that was good enough to get it rolling ( just a couple of minutes work ) we went out on the - luckily very quiet - road for the testdrive. This was a case of trail and error too, stopping by the side of the road for some adjustments on the computer. Long story but it all worked out fine without any major problems !!
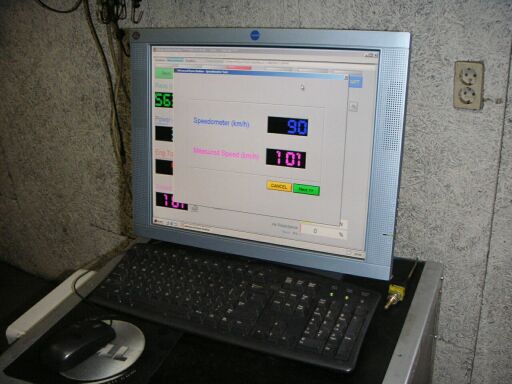
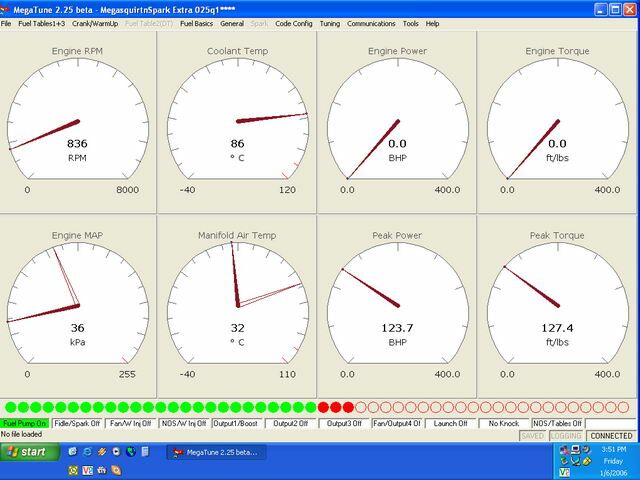
Below 2 screenshots from the MegaSquirt program on Niels' laptop. The computer calculated 123.7 HP and 172 Nm, but that's a calculated guestimate and without the "loss" of waterpump, generator, charger, gearbox etc.
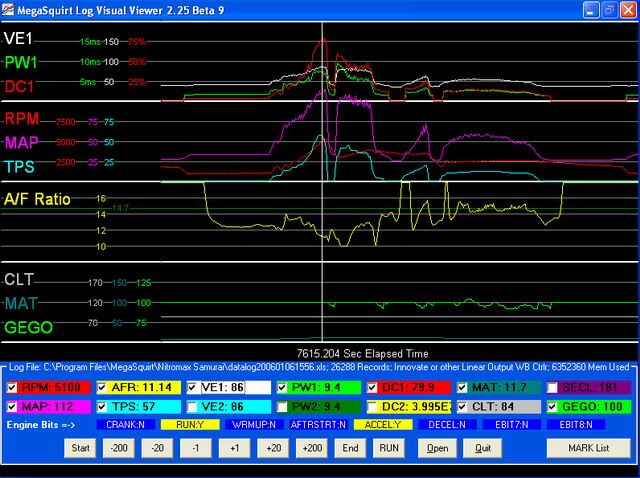
We noticed that the airintake temperature was way to high to be reasonable and that's because I drilled a Stainless Steel M12 bolt with M8 thread through the centre for the sensor, but the metal to metal contact was making the sensor measure the temperature of the intakemanilfold itself too, so I had a Delrin bolt made for mounting the sensor in the intake. Unfortunatly the sensor was still heat-saturated so for the moment it's in the short rubber hose between K&N and throttlebody.
I went out for a longer testride today and it runs incredibly smooth, no stalling, very fast on take-off, no hick-ups.
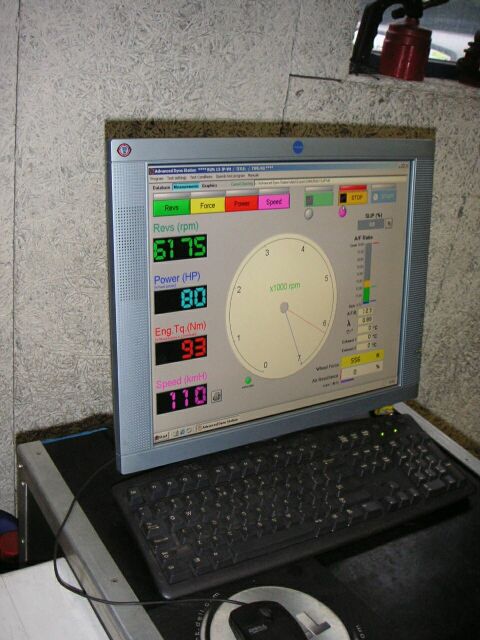
Second time on the Dyno resulted in:
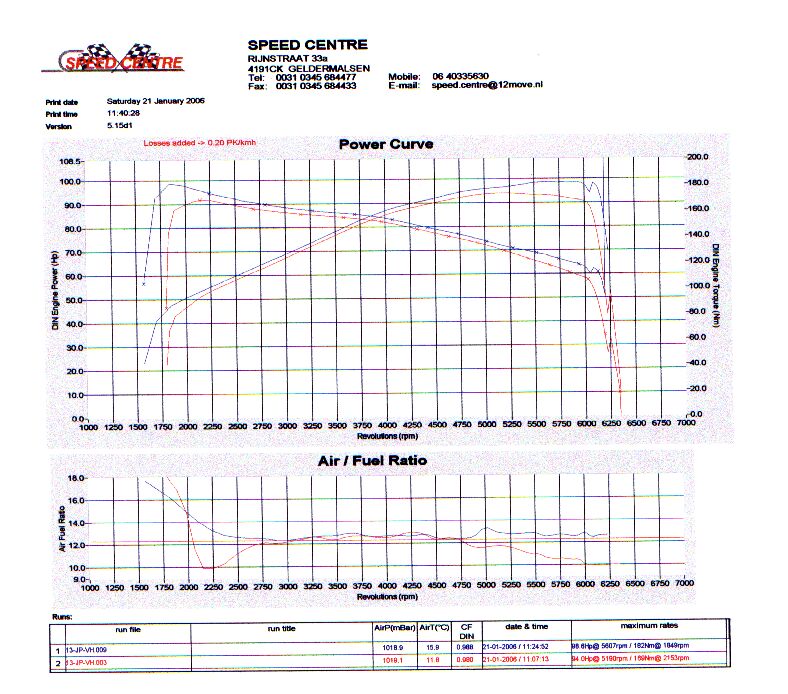
98.6 HP @ 5600 and 182 Nm @ 1850 revs
Looks a little disappointing at first, "only"an increase of 32 Nm and 8.6 HP for real, but the torque-increase is exaclty in the region where I need it. And it's all from one modification !!
I was a little concerned with all the stuff involved in this conversion, but in retrospect it was only a couple of days work. Would have been nowhere without the help of Niels, the guy that knows everything about tuning the MS from reading their magnificent Forum !
Quote from Niels'story on the Forum:
MSEFI V2.2 with 025q1
extra code
Running 4 injectors of a Vitara 175cc/min @ 45 psi
Bosch fuel pump.
Billet pressure regulator with meter.
Revlimiter set at 6500 for extreme fly outs .
Overrun at 1400 rpm 33 kpa, about 3% throttle , 70 deg celcius and off
at 1 sec.
Keep checking back for more !